Showing posts with label recipe. Show all posts

Thursday, April 24, 2014

Daily Dish - Chicken, asparagus pizza

Well, now that the kitchen is done, we're back to being able to cook in it regularly.  It's a joy!  I'm making a conscious effort to keep the excessive number of appliances we have off the counters as much as possible.  I'm also making an effort to use them more! 

My little brother is general manager of a very high end restaurant, so qualifies as a mega-foodie.  As it turns out, he has been known to sneak around our kitchen, when visiting, to evaluate what appliances we might be missing, and then fills in the blanks for holiday gifts.  That is how we ended up with our bread machine.  We weren't particularly happy with the pizza dough recipe that came in the instructions booklet, so gave this one a shot, which turned out nicely.  I made a double batch so that we could freeze half for later.  I definitely enjoyed the convenience of being able to attend to the little one while the machine worked it's dough magic - hands free!  Of course, you could make your own pizza using a store bought dough or base as well.

Chicken asparagus pizza

- 1 cooked chicken breast, cut into cubes
- 4oz skinny asparagus (cut into 2" pieces)
- 1/2 medium onion (thinly sliced)
- 1/2 red bell pepper (sliced)
- 1/4 cup grated Parmesan cheese
- 1/2 cup grated mozarella cheese
- 4 tsp olive tepenade

Pre-heat the oven to 425.  If using raw dough, roll out the dough and put onto the pizza pan.  Once the oven is at temp, put the prepared dough in the oven for about 5 minutes to crisp the top.  This prevents it from becoming soggy once the toppings are added.  Remove from oven and add toppings - use the olive tepenade as your base, then top with mozarella cheese, chicken, veggies, and sprinkle Parmesan cheese on top.  Bake for an additional 15 minutes.  Enjoy! 

Wednesday, January 29, 2014

Daily Dish - Lemon chicken with roasted cauliflower

When you co-worker gives you lemons, make a chicken dish!  That's pretty much how this happened, and it was good! 

This recipe (from the Barefoot Contessa) for lemon chicken not only highlights the lemon really well, but it also contains a ton of garlic, which is always a winner for me.  We used chicken without the skin, although I can imagine that the skin-on version is pretty amazing.  The prep time is very quick and then you just pop it in the oven and forget about it for 30-40 minutes, which makes it weekday friendly. 

As a side, roasted veggies are one of my favorite things - not only super simple but they taste amazing.  I broke a head of cauliflower into florets, then tossed with olive oil, salt, red pepper flakes, garlic powder, and parmesan cheese.  They went into the oven, with the chicken, for about 25 minutes.  That gave me ample time to clean up and be able to eat knowing the kitchen was already clear. 

Overall, this was an easy to prepare, healthy, low calorie meal with a nice punch of flavor.  Highly recommended!

Tuesday, July 16, 2013

Daily Dish - A little Brownie

I told you a couple of weeks ago about a baby shower I threw for my friend.  I finally got off my butt and pulled the photos off my camera, so now I can finish telling you about the favors!

The mom-to-be's last name is Brown, and she's having a girl, so the pink and brown shower "theme" was created.  I had spent several days thinking about favors, which are always a bit of a challenge as I always prefer favors to be either practical or edible.  I had an a-ha moment when I realized we'd been joking for months about how she's "baking a little Brownie", and brownies must therefore be the favors!  My original thought was to make a full batch worth of brownie mix in a mason jar, but this was turning out to be incredibly cost prohibitive on account of needing excessive amounts of cocoa powder.  That's when my friend made the genius suggestion of doing a brownie-in-a-mug.  Now, I should note that I didn't even know such a thing exists.  I'm also quite sure my waistline doesn't need to know that I can make a brownie...in a mug...in 60 seconds...in the microwave.  Too good to be true right?!  Of course, Husband and I had to taste test the recipe (several times) and it has a consistency that is more like the center of a molten chocolate lava cake, which means it's deliciously rich.  Ice cream or milk is a requirement!

I bought cute pink polka dot cone bags at Party City, brown ribbon, and plain white mugs at the dollar store, then added all the dry ingredients to the cone bags.  I think they turned out nicely!  For those of you curious about making this, here's the recipe card.  Your mouth will thank me even if your hips don't.


While we're talking dessert, you should drool over the desert bar that was on offer.  Pink lemonade cupcakes with chocolate ganache, super cute sugar cookies, and my friend Paige's infamous cake pop babies.  Cutest thing ever!


So, congrats to the mama-to-be (pictured here with Owen who is trying to eat her childhood doll).  We're thrilled for the arrival of your little Brownie!  :)


Friday, June 7, 2013

Daily Dish - Pork chop with mango salsa & couscous

I'm really trying to be more creative in the kitchen.  While we have our staples that are quick, simple, and Deuce kitty could probably cook from watching us make them enough times, I have always loved variety in my food.  I'm not a big meal planner though, so it can be hit or miss whether I can put together something new and fun with the ingredients in the house.  Last night, I hit the jackpot though.

It all started with a pork chop.  We like to get the center cut pork chops from Costco.  They're thick and I don't think we've spotted a lot of other chops that come close in comparison.  That led me to the mango salsa, which was easy because we keep frozen mango in the freezer for the baby these days.  It is easy to dice from frozen and defrosts quickly too.  Don't get me wrong - I love a fresh mango, but it can be easy to miss that perfect ripeness.  As a nice compliment to the protein, I whipped up a little Israeli aka "pearl" couscous (which I generally prefer to the standard American couscous as it has a more hearty texture) with some sauteed veggies.  This was super easy to make, and has a pretty short prep/cook time too!  I will say that I loved pretty much everything about this dish, so here's a recipe for you.


Serves 2    

Make the mango salsa first, then set aside while the other components are cooking.

MANGO SALSA
1/2 cup diced mango
1/4 cup red onion (I actually substituted green onion because we didn't have any red onion)
1/4 cup fresh cilantro, roughly chopped
1 medium japaleno (If you feel like the jalapeno is too much, it's not as spicy once eaten with the pork chop)
1/2 lime
Salt

Place first four ingredients together in a bowl.  Add the lime juice and salt, stirring until well mixed.

PORK CHOP & COUSCOUS
2 center cut pork chops (approx 1" thick)
1 cup chicken stock
1 cup Israeli "pearl" couscous
1 small onion
1 cup baby bella mushroom
1 cup spinach
2 tsp Lemon juice
Olive oil
Salt, pepper, garlic

Season pork chops with salt, pepper, and garlic.  Place oil in pan and heat until medium-hot.  Add pork chops and cook until there is a nice brown sear (approx 4-5 minutes on each side).  Lower heat, add the chicken stock to the pan, cover, and cook until pork chops have reached an internal temperature of 145°F.

While the pork chops are cooking, start to cook the couscous per instructions on the packet.   The instructions on the package I had were to add couscous to 1 1/4 cups boiling water, salt, and cover.  Cook for 8-10 minutes stirring frequently.

In a separate pan, heat olive oil, then sautee onion, mushroom, spinach and garlic over medium heat.  Once couscous is finished cooking, remove pan from heat.  Add in sauteed vegetables, toss well with the lemon juice and a little extra olive oil.  Sprinkle with salt and pepper to taste.

Once both the pork and couscous are done cooking, serve it up, adding the mango salsa on top of the pork chop.  Enjoy!

Friday, April 5, 2013

Daily Dish - Stuffed Peppers

We eat a lot of bell peppers in our house.  Apart from the fact they come in so many pretty colors, they're really versatile in terms of how you can eat them - I love them raw as well as cooked in anything from pasta sauce to curry!  I actually looked up the nutritional value recently because I feel like leafy greens or cruciferous veggies (i.e. broccoli) get a lot of attention, but what about bell peppers as one of my favorite vegetables?  I was actually pleasantly surprised by what I found - they are full of the good stuff!  They're super high in Vitamins A & C, have a good amount of Vitamin B6 and fiber, plus contain anti-oxidants.  All that while being low in calories (1 pepper = 30-40 cals).

With that in mind, time to share another Pinterest win as far as recipes go!  I came across the most beautiful bell peppers the other day - which means they were meant to be filled with all kinds of yummy goodness. I'd pinned a stuffed pepper recipe a while back.  It had caught my eye because it wasn't in a tomato sauce that I seem to associate with stuffed peppers!  We added a little left over brown rice and used ground beef instead of turkey, but this was delicious.  Even better, as we used 4 good sized peppers to make it, we have left overs sitting in the fridge for lunch tomorrow.  I do love a meal with leftovers!

If you want to keep track of my tried and tested recipes, follow my Eat It Again board and don't forget to check the comments on each pin for any modifications and ideas.  

Thursday, October 4, 2012

Daily Dish - Apple Pie

Apparently, it's fall.  Living in SoCal, we don't experience much for seasonal changes.  The fact that we started off October with triple digit heat has me wondering when the time will come for soup, hot cocoa and snuggling under blankets.  Perhaps I'll get the cool down in time for my maternity leave. 

Regardless of what the weather is doing outside though, there is no bad time for apple pie.  I have scored some great deals on Granny Smith apples at the store recently, so decided to venture into pie baking.  I'm a dutch apple pie kind of girl, as I can be picky about how the top is baked with regular pastry, so when I found this recipe for Butter Crumble Apple Pie, I knew I was onto a winner.  It's so unbelievably easy, but lives up to it's name (i.e. buttery and crumbly).  We ate this topped with a little Cool Whip, and also tried it a la mode for subsequent tastings.  I can assure you it's delicious with both.  :)

What are you looking forward to for fall?

Friday, June 22, 2012

Daily Dish - Cottage Pie

You probably know this dish as Shepherd's Pie, which is what the dish is called when the meat used is either mutton or lamb (strangely logical no?)  I made it with beef, which is traditionally a Cottage Pie - probably because that is better than it being called a "cow pie".  ;)

Anyway, here is my super simple (but tasty) recipe!

For the filling:
1 lb ground beef

1 medium onion (diced)
1 carrot (diced)
1/2 cup frozen peas
2 tbsp flour
2 tbsp Butter
1 cup beef broth
Worcestershire sauce
Nutmeg, oregano, paprika, salt & pepper

For the mashed potato:
4 russet potatoes
Butter, milk, salt & pepper
Cheese (optional)

  • Preheat oven to 425.
  • In salted water, boil the potato (chopped into smaller chunks) until soft and easily pierced with a fork, approx 10 minutes.
  • While the potato is boiling, brown the ground beef in a pan with salt and pepper.  
  • Once the beef is browned, add the onion and carrot along with a sprinkling of each of the spices (to taste)
  • In a separate pan, melt 2 tbsp of butter
  • Once butter is melted, add the flour and mix.  Then add the beef broth to the flour/butter mixture and stir until smooth. 
  • Put Worcestershire sauce into the gravy mixture.  I use about 2 tbsp, but I was eyeballing it so adjust according to your preference!
  • Pour gravy mixture onto the beef and vegetables, then add the frozen peas.
  • At this point, the potatoes should be about done, so drain and mash them. 
  • Add butter, milk, salt & pepper to the potatoes according to your preference.  I like my mashed potatoes to be smooth and buttery.
  • Spoon the beef and vegetable mixture into a baking dish.  (I used ramekins designed for personal portions, but you can also use a medium sized baking dish).
  • On top of the beef, add a layer of the mashed potato.  Even out the top with a fork so that the meat is all covered. 
  • We love adding cheese to things in our house so we elected to sprinkle some shredded cheddar on top.
  • Bake in the oven for about 10 minutes, or until the top of the potato is lightly browned and crispy.

ENJOY!

Wednesday, May 9, 2012

Daily Dish - Oatmeal Raisin Cookies

I've been wanting to make some oatmeal raisin cookies for a while, although with recent pregnancy-induced exhaustion, I never quite got around to it.  However, my baking was requested at work last week, which gave me the perfect excuse to find the perfect recipe.  (I should add that if you'd told me a year ago that my baking would actually be worthy of request by others, I'd have laughed at you...but now I'm just very proud of my learning curve!)


If any of you are foodies and not familiar with Smitten Kitchen, I recommend checking it out.  Not only do the recipes sound delicious, she takes gorgeous photos which may cause drooling (you have been warned).  When I found her recipe for thick and chewy oatmeal raisin cookies, I knew I'd found a winner.  Sure enough, they were moist, with a really nice texture, and overall quite delicious (even if I say so myself!)  I do need to get myself a cookie dough scoop though, after using one of my plastic measuring spoons to scoop the dough and successfully breaking off the handle.  If I'm planning to buy supplies, I must be feeling good about this baking thing....who knew.  :) 

Monday, January 23, 2012

Daily Dish - Carrot Cake

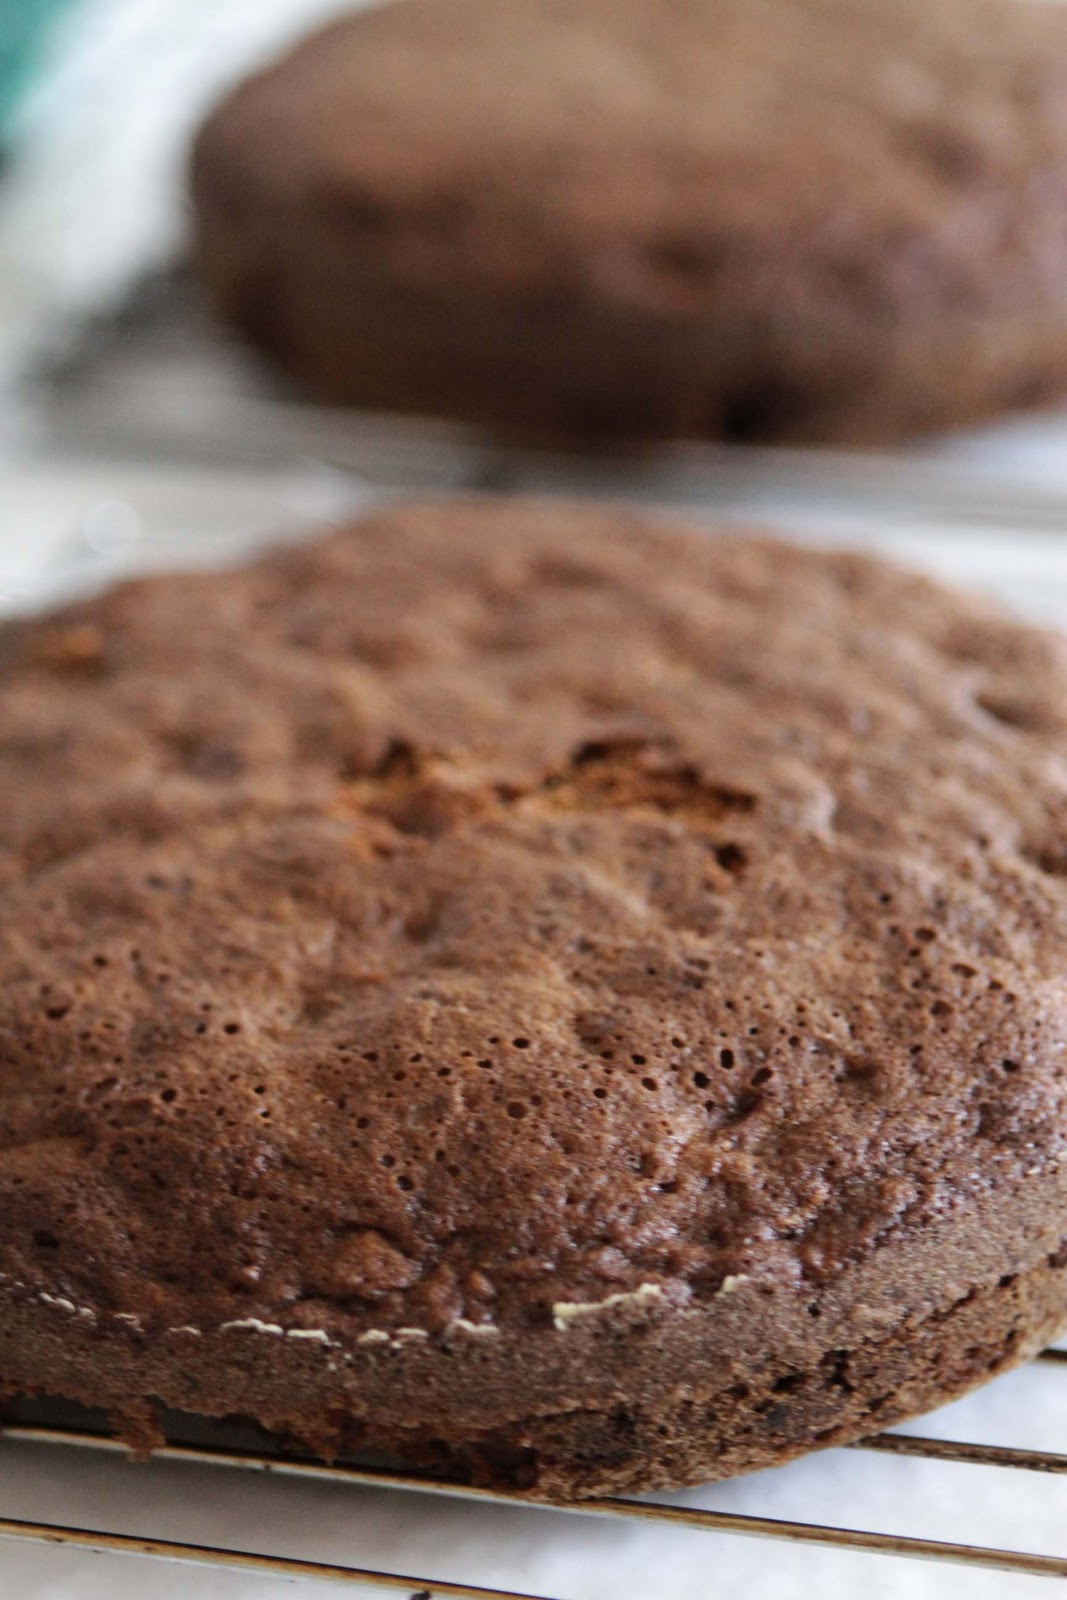
Carrot Cake on 365 ProjectHaving mastered the pumpkin muffins that I shared last year, round 2 in my mission to learn how to bake is carrot cake.  Yes, I could have gone for something less involved, but where's the fun in that?  I'm still amazed that I actually made this, didn't burn it, or have it collapse on me.  It's not the most beautiful thing I've ever produced (i.e. I have no frosting skills) but it tastes damn good, so we'll call it a success!

I reviewed quite a few recipes online and read some of the comments/suggestions, and came up with the following recipe. Enjoy...

Carrot Cake

4 eggs
1 1/4 cup vegetable oil
1 cup white sugar
1 cup brown sugar
2 tsp vanilla extract
2 cups all purpose flour
2 tsp baking soda
2 tsp baking powder
1/2 tsp salt
2 tsp ground cinnamon
3 cups grated carrots
1 cup chopped pecans
8oz can pineapple (drained)
1 cup raisins


  1. Preheat oven to 350.  Grease and
    flour two 9" pans.  
  2. Beat eggs, oil, sugar, and vanilla.
  3. Mix in flour, baking soda, baking
    powder, salt, and cinnamon until
    smooth.
  4. Stir in carrots, raisin and pineapple.
    (I included a couple of teaspoons of
    the pineapple juice).
  5. Fold in pecans.
  6. Bake for 40 minutes (until toothpick
    comes out clean).
  7. Cool in pan for 10 mins, then
    transfer to cooling rack to let cool
    completely.
  8. Frost!  (I used a cream cheese
    frosting recipe that I also found
    online, below).


Frosting 

1/2 cup butter
8oz cream cheese
4 cups confectioners sugar
1 tsp vanilla extract


Next up, I'll probably go back to something more basic. I sense an oatmeal raisin cookie in my future...once I've eaten all the carrot cake that is!

Thursday, October 27, 2011

Daily Dish - Mini Pumpkin Muffins

Continuing the Halloween theme for the week, my friend Holly over at Indie Home Ec sent me this recipe for mini pumpkin muffins and promised even I wouldn't be able to completely bugger it up.  So, I gave it a shot...

If any of you have been paying attention to what I cook, you may have noticed that baking is not on the list of things that I do (albeit on the list of things I'd like to do better).  I figure most people fall into either the cooking or the baking category.  I'm firmly in the cooking camp seeing as I generally don't measure things, which is really a problem when trying to bake, and my past attempts at baking have been, um, "questionable."

Pumpkin Pie Spice (makes 1 tsp):
1/2 tsp ground cinnamon
1/4 tsp ground ginger
1/8 tsp ground nutmeg
1/8 tsp ground allspice (or clove)


I think it says enough about my usual baking skills when husband got home from class, walked into the kitchen to find me blending flour-y stuff with pumpkin-y stuff, and the first words out of his mouth are "I can't believe you're baking...and it's not from a box".  As if that wasn't bad enough, while I was happily filling the regular sized muffin cups, I asked him to grab the mini muffin tray from the cabinet.  He says, "you mean this one?  In the wrapper?"  Yes, the one we got as a wedding gift...nearly 4 years ago.

Regardless, 25 minutes later, I had a batch of muffins ready for cooling and tasting.  We both ate one and success!  They were moist, tasty, not deformed (which is more of an accomplishment for me than you might realize) and, as husband pointed out, "at least you didn't burn them".  It has to be said, the recipe is pretty foolproof as the pumpkin keeps everything nice and moist; plus they're not bad for you.  100 calories for 3 mini muffins (or 1 regular sized muffin as an estimate) is almost completely guilt free.  I just wish I'd had a little more granola to sprinkle on top.


I finally baked something from scratch that is worthy of feeding to other people - and even brought some to work.  I'm happy to report that all of my co-workers survived and none of them seem to have called in with food poisoning, so we'll call this one a win!

Friday, October 14, 2011

Daily Dish - Ahi Tuna Salad

Firstly, before I share last night's culinary masterpiece, I want to wish my parents a Happy Anniversary!  They're celebrating 33 years today, and that's definitely worth a mention.  :)

Now, on to the food...
Usually when I've cooked something that looks awesome, I'll snap a shot on my phone and upload it straight to Facebook.  This meal was particularly well received, and I haven't done a recipe post in a while, so I figured I'd share.

A little while back, Living Social was doing a $10 for $20 coupon for Whole Foods.  Now, usually I don't frequent Whole Foods at all - it's just not my thing and is generally well outside my rather streamlined grocery budget.  [I also don't love the fact that in my experience, Trader Joes and Whole Foods have consistently terrible parking lots that make me crazy before I even get into the store.]  However, our entire intent with this coupon was to splurge on some fish that we wouldn't ordinarily buy at our regular grocery store...and that we did! 


Seared Ahi Tuna salad with a ginger-citrus soy dressing.
Dressing:
These are estimates, so adjust according to taste!    
1/2 cup Soy sauce
2 tbsp Sesame oil
2 tbsp Rice Vinegar
1 Lime, juiced
2 tbsp Orange juice
2 tbsp Ground ginger
1/2 tsp Black pepper
Green onion


Salad:
Spinach
Red bell pepper, sliced
Carrot, sliced
Green onion
Jalepeno, finely sliced (this is optional, but gave
it a really nice kick!)


Of course, you can really put whatever you
want in the salad, this is just what we did.


The tuna already had a ginger-soy marinade on it, so the only addition was to sprinkle some sesame seeds on it.  Then, we got a pan going nice and hot with some olive oil, then seared the fish for about a minute each side.  Once that was done, we sliced it over the salad and poured the dressing over.  Delicious AND healthy!  This is something we'll make again, should we be feeling the need to splurge.

Thursday, July 28, 2011

Daily Dish - Tagine

Silly me keeps forgetting to grab the recipe card I wrote out for the tagine I made on Sunday.  I'm going to attempt to replicate my recipe here, which was a hybrid of various recipes I found online.

My mom first made tagine for us during the annual parent visit over the holidays last year.  I had no idea what it was so, for those of you who are also unclear, it is a Morroccan dish named after the clay pot that it's made in.  Fortunately for us foodies, you don't actually need a fancy earthenware pot to make this dish!  I opted for the crockpot which, seeing as I ran out of counter-space due to an over-abundance of kitchen appliances, was tucked away for the summer.


Ingredients (Serves 2):

2 large chicken breasts, cut into chunks
1 red onion
4 cloves garlic
1 carrot
1 tbsp flour
4 oz dried pitted prunes
1 tbsp tomato paste
1 (14 oz) can diced tomatoes
1 (14 oz) can garbanzo beans
2 tbsp honey
1/4 pint chicken stock


Spices:
1/2 tsp ground cinnamon
1 tsp ground ginger
1/2 tsp tumeric
1/2 tsp ground coriander
1/2 tsp ground cumin
1/2 tsp cayenne pepper
salt & pepper

First, sautee the onion and garlic in some olive oil. Then add the chicken stock, and carefully mix in the flour until dissolved and not lumpy.  Next add the honey and tomato paste, again mixing until smooth.  Add the spices, with salt and pepper to taste.  Finally, add the can of tomatoes. 

Brown the chicken pieces.  I used chicken breast but you could very easily use any part of the chicken that you want. I'd actually never done chicken in a crockpot before (wings not withstanding) so forgot to lightly brown the chicken, but will definitely be adding this step next time around. 

Add the sauce, the chicken, and all the other ingredients into the crockpot.  Cook on high for 3-4 hours (or you could leave it for 7-8 hours on low).  We decided to serve with rice, although more traditionally this would be served with couscous or flat bread. I've read that you can garnish with cilantro or lemon, which I plan on doing next time around for sure!  This can also be made with beef or lamb, or substituting apricots and almonds for the prunes.  Essentially, there is no reason not to try different combinations each time you make it.

All in all a really tasty meal and even better, you can leave it unattended while you go do your thing, with the added benefit of the house smelling delicious while it cooks!

Yes, that is a paw.  Deuce photo-bombed again!

Wednesday, February 9, 2011

Daily Dish - A little faux Cordon Bleu

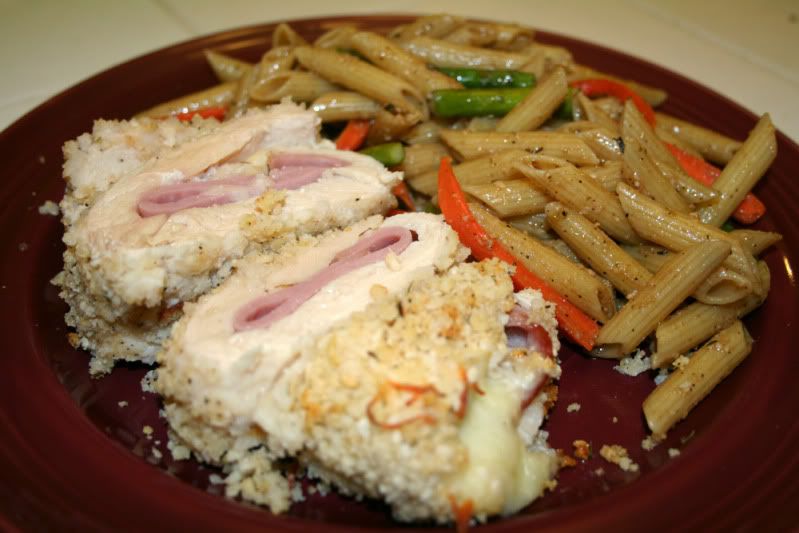
Sometimes I'm trying to think of what to cook for dinner and I'm completely uninspired.  That's when Food Network comes in handy.  Today, while perusing chicken dishes, I came across this Chicken Cordon Bleu recipe from Tyler Florence.  No prosciutto, but we have deli sliced ham.  No gruyere, but we have a 5 Italian cheese blend.  Done!

I decided to make a little grilled veggie (asparagus, carrot, green onion) pasta on the side, tossed in a simple sauce of my own.  These are approximations because, as you know, I never really measure anything!

- 1/4 cup olive oil
- 1/8 cup balsamic vinegar
- 1 tbsp Dijon mustard
- Italian seasoning
- Salt & pepper
- Grated parmesan

Wednesday, December 1, 2010

Daily Dish - Leftover Turkey Bake

I think I can finally see the light at the end of the tunnel when it comes to Thanksgiving leftovers.  After sending away various bits and pieces in care packages, we still had quite a lot in the fridge to eat.  Really, I just want my fridge back so I can put some non-holiday related food in it.  Of course, there's always the question of easy left over recipes, and I'm sure you all have your favorites.  This one came to me while driving home last night, and (if I may blow my own horn here for a moment) it was delicious!

Ingredients:
Leftover turkey (cut into chunks)
Bacon pieces (optional - but we bacon wrapped the turkey so had some left)
Onion
Peas
Carrots
Gravy (can substitute for regular stock if you don't have any leftover gravy)
Mashed potato
Grated cheese
Worcestershire sauce

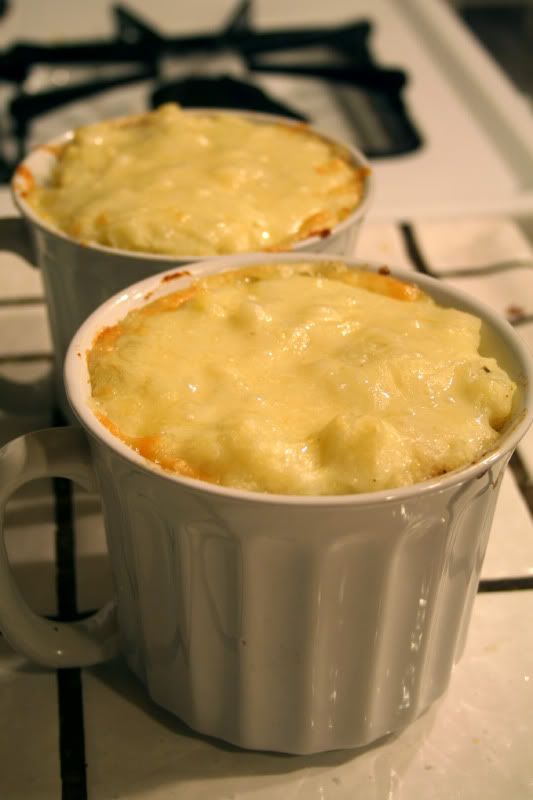
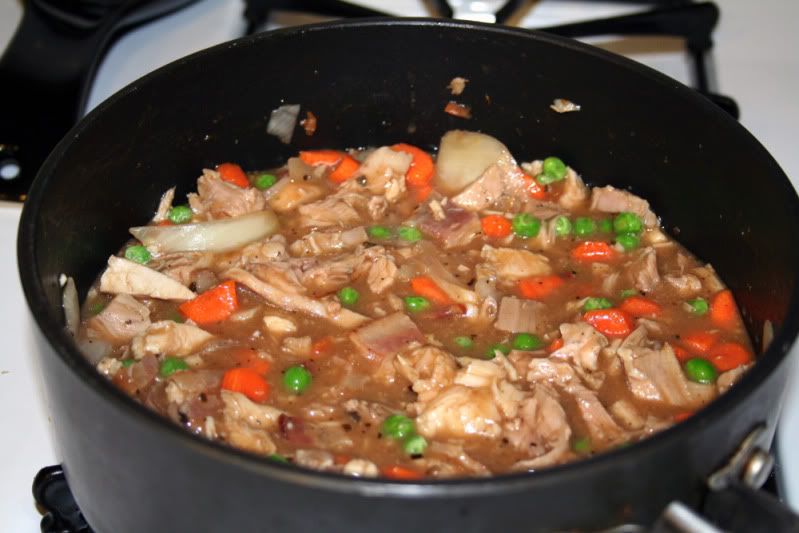
Pre-heat oven to 375.  Briefly saute the turkey, onion, peas and carrots in a pan.  Add a cup of gravy (or stock) to coat what it's in the pan and a splash of Worchestershire sauce to taste.  If using gravy it may be too thick.  Add a little bit of water until it's thinned to the right consistency.  Once everything is heated through (which should only take a few minutes), scoop the mixture into a ramekin, or other type of oven safe dish until about half filled.  Add a layer of mashed potato, then sprinkle with grated cheese.  Pop into the oven for about 15 minutes, or until the cheese is melted and lightly browned.


It's truly that simple and took less than 30 minutes from the time I started making it to the time I started eating it!  What are your favorite Thanksgiving leftover recipes?

Friday, October 15, 2010

Daily Dish - Fish 'N Chips!

In preparation for my upcoming trip to England, I recently decided to make some fish & chips.  This is a super simple recipe and, overall, healthier for you than regular fish and chips.  The traditional thick breaded batter, while disgustingly delicious, does somewhat detract from the benefits of the fish.  In this case, the fish is pan fried instead of deep fried.  Also, the chips are baked.  I went all out and added some peas on the side - both tasty and can be used as non-lethal projectiles as necessary!

Generally, the fish used is cod or pollack.  In this case, I used catfish because that's what we had in the house.  Any nice and meaty whitefish will work.

- Sprinkle breadcrumbs onto a plate.  I like to mix in a tiny bit of cayenne pepper for a spicy kick, although that is optional.
- In a shallow bowl, mix together one beaten egg with a little bit of milk.
- Dip the fish in the egg/milk mixture until completely coated on both sides, then cover with the breadcrumbs until there is an even layer.  Set the pieces of fish aside.
- In a deep pan, pour a nice thick layer of vegetable oil until the entire bottom of the pan is coated.  That way the fish will cook evenly.  The oil needs to be nice and hot before putting the fish in.  I like to test whether it's hot enough by flicking a little water off my fingers.  If you hear sizzling when it hits the pan, it's ready.
- Pop in the pieces of fish and cook for 4-5 minutes per side.  How long you cook it will depend on the thickness of the fish.  I like to stick a fork into the thickest part of the filet to see if the fish is flaky.  If not, add another minute or two on each side.  If it's flaky, pull it out of the pan and onto a plate!!

I can't wait to eat the "unhealthy" version of this when I get back to England because for as many times as I've eaten fish and chips at restaurants out here, it's not the same as standing on a sidewalk (or should I say "on the pavement") pulling off chunks of battered fish from a big wad of paper, piled on top of a stack of greasy chips.  Yum!

Thursday, May 6, 2010

Daily Dish - Cinco De Mayo Enchiladas

It seems that Cinco De Mayo is one of those adopted holidays that we celebrate on account of needing an excuse to drink, as if an excuse were needed.  This is the reason that my husband has fittingly dubbed it "cinco de drinko".  It's up there with St. Patty's day and I wonder how many people even know the significance of either holiday.  Either way, my festive side was inspired to cook up a tasty Mexican treat for dinner last night.  I've been working late a lot recently so needed a quick and simple, but of course tasty, dinner.  I opted for my version of enchiladas and here's the recipe - I think the whole thing takes 30 minutes, 15 of which the food is in the oven which gives you more time to sip on that margarita while waiting.

Ingredients:
1 large chicken breast
Fajita or taco seasoning (husband makes ours so you can make your own, or get it at the store)
1 cup (or so) shredded Cheddar cheese
8 Flour tortillas
1 can enchilada sauce
Chopped onion (I used green onion last night, but a regular onion would work too)
Olives for garnish (optional)
Sour cream (also optional)

Disclaimer - I don't usually measure stuff and these are all estimates!
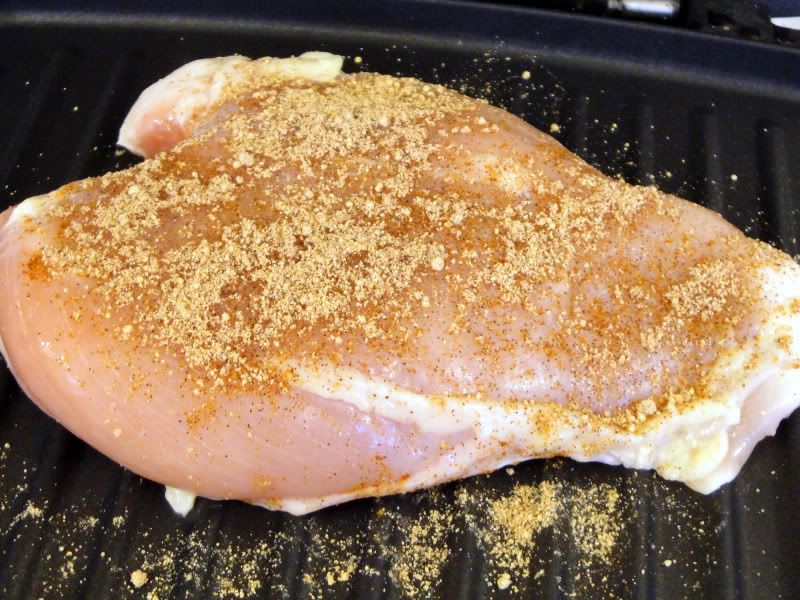
Step 1 - Season the chicken with fajita or taco seasoning.  If you don't have any handy, I suggest a mixture of chili powder, cumin, cayenne pepper, salt, garlic powder, and paprika.  Once the chicken is suitably sprinkled with the good stuff, pop it on the grill.  I cheated and used the George Foreman seeing as it cooks anything in about 6 minutes.  Of course, you're more than welcome to use a pan. 


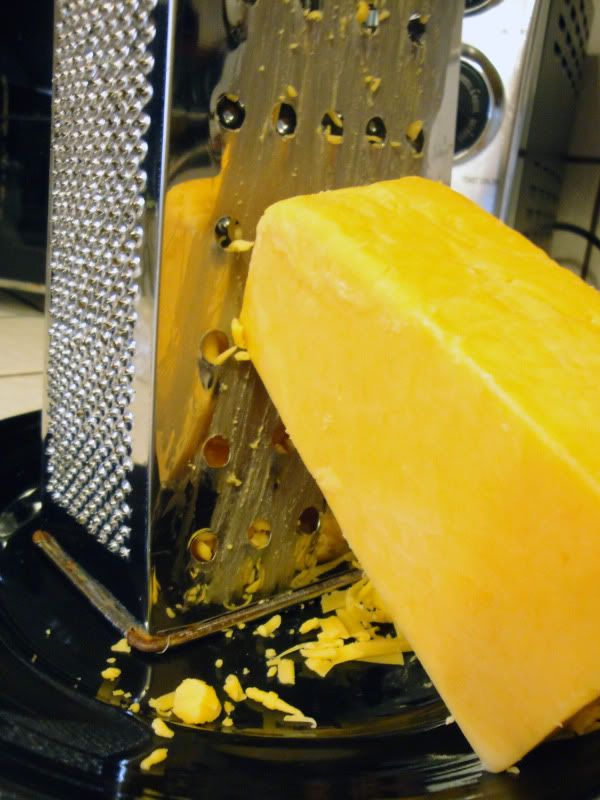
Step 2 - While the chicken is cooking, take this opportunity to prep all your other necessary bits and pieces.  This means chop up the onion, shred the cheese and, if you aren't using diced olives, cut those up too.  I noted that you need a cup of shredded cheese in the ingredients list - that's a total estimate.  You'll need enough to sprinkle a little bit inside each enchilada as well as a nice layer on top.  In our house, we're uber cheesy so probably use more than we should.  Our fat intake thanks us.


Somewhere around this point I believe I preheated the oven to 375.


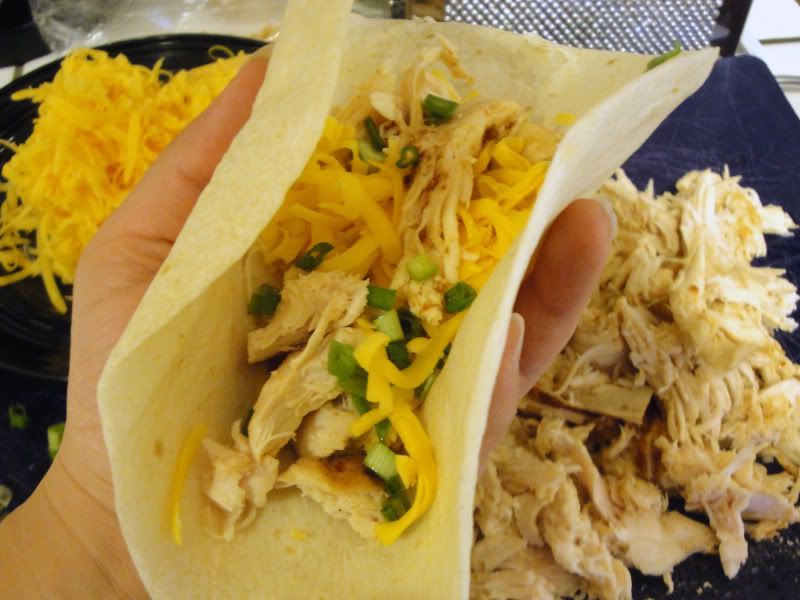
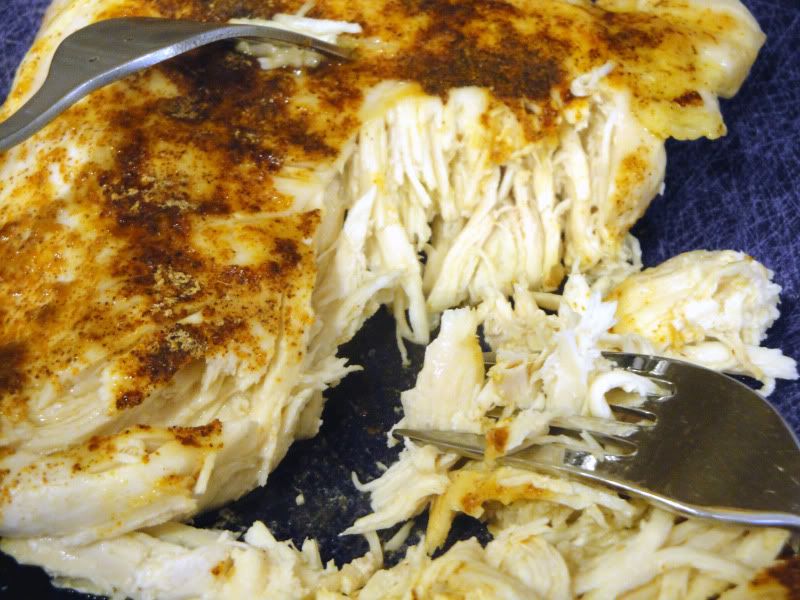
Step 3 - Once the chicken is cooked, you'll want to shred it.  I've seen recipes before suggest you pull it apart with your hands.  Now, keeping in mind the chicken just came off the grill and it's hot, I came up with my own ingenious solution to this that doesn't involve second degree burns.  So, grab 2 forks and use one to anchor the chicken while you pull off bits of chicken with the other.

 
Step 4 - Grab your pyrex dish (which should be wide enough to fit a tortilla) and open up the can of enchilada sauce.  Pour a little of the sauce on the bottom of the pyrex, which will prevent the tortillas sticking.  Now all your stuff is ready, pop the tortillas in the microwave for about 30 seconds to warm them and make them easier to roll up.  Inside each tortilla, put some chicken, a sprinkling of cheese (don't forget to save some for the top) and onion.  Then roll the tortilla into a tube and place it in the pyrex with the flap facing down (so that it doesn't unravel). 

Step 5
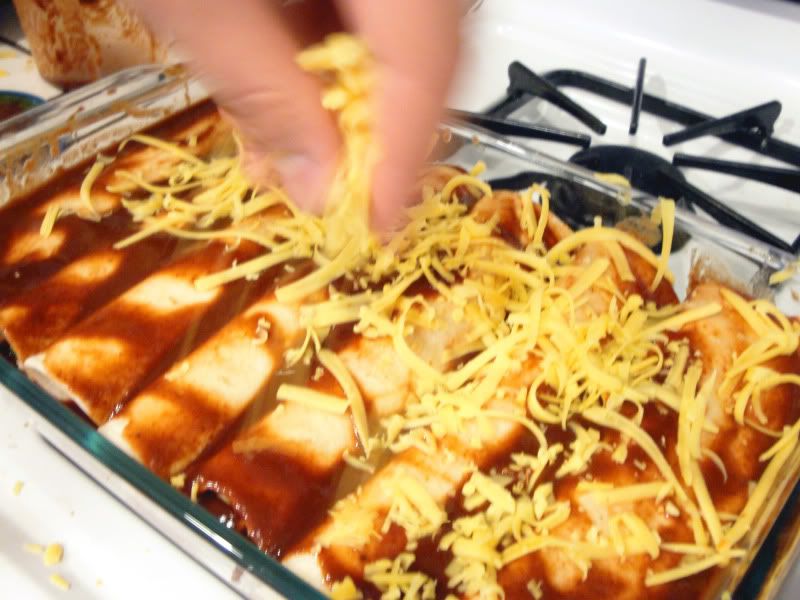
- Once all the tortillas are rolled and snug in the pyrex, pour on the enchilada sauce.  Make sure you get the sauce down the sides and in between the tortillas too.  We usually use a half can because for some reason enchilada sauce comes in the 28oz cans and there's just far too much!  If you like your food super saucy though, go for it.  Once it's been sauced, sprinkle the rest of the cheese on top, then add the olives if you've elected to use them. 


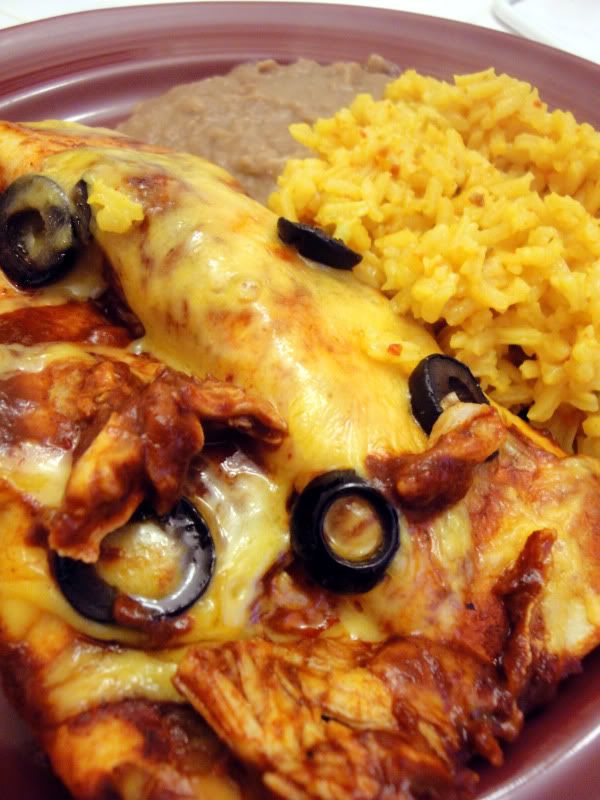
At this point, you just pop the dish in the oven for 15-20 minutes until the sauce is bubbling and the cheese has all melted.  I took those 15 minutes to make a little rice and heat up some refried beans for side dishes.  Once the enchiladas are on the plate, you can also add a dollop of sour cream (which I did right after taking this photo).  The best part, this fed both of us and we had leftovers for lunch!  
Do any of you have a good, quick and tasty Mexican recipe to share?  If so, would love to hear it!!

Wednesday, April 14, 2010

Daily Dish - Salmon, veggies and rice

When it comes to new recipes, the internet has to be the most wonderful addition to my recipe library.  I'm pretty sure you can type any three ingredients into Google and it'll find you a recipe for something.  On account of this, husband and I have been trying all kinds of new dishes over the last year or so.  If we like the dish, we'll usually bookmark it to find easily later.  As we continue with these culinary adventures, both the wins and the fails, I'll be sharing them with you.

This weekend, we tried a Food Network recipe for Grilled Salmon Steaks with Chipotle Ponzu sauce.  Rather than use the green beans that the recipe called for, we had some fresh broccoli that needed using so made a broccoli/carrot medley instead.  Seeing as I was cooking rice in the rice cooker (one of our most used kitchen appliances, a gift from our buddy Jessica) I went the easy route and popped the veggies in with the rice to steam briefly.  Unfortunately the salmon took a couple minutes longer than anticipated on the grill so the veggies were a tiny bit over-steamed, but still tasty!

This recipe was a good one, although we ended up with a lot of the Ponzu sauce, and if I were to make it again, I'd definitely use less orange juice seeing as it had a very strong orange flavor.  That's not a bad thing but husband and I both prefer our ponzu sauce to be a little less citrusy.  It's a personal preference of course.  I would say this entire meal cost about 20 minutes to cook, and probably would have taken less time if it hadn't been for the rice.

If you have a favorite recipe that you think I should try, leave me a comment and I'll add it to the list!

Tuesday, April 6, 2010

Daily Dish - Mmmm...cheesecake!

While the Easter egg hunt was not successful, one thing that did come out of it was the inspiration to try making cheesecake. This is the result of standing in the 99c only store, staring blankly at a box of Graham Cracker Crumbs, while wondering where the hell the Easter candy aisle has gone.

So, when it comes to things in the kitchen, I'm admittedly a pretty decent cook. That is unless you want me to bake you something. Others will testify that my baking skills are a little...um, off (just ask about how I made square cupcakes ok?) Regardless of my self-professed lack of baking skills however, I'm also willing to try making anything once. Looking at the recipe on the back of the Graham Cracker box, I figured it just can't be that hard! The only thing I didn't have on the supplies list is a spring form pan, but I made do with a 9" cake pan and managed to get it out without it collapsing all over the place. That in itself is quite the accomplishment for me.

A little help from the husband while "fluffing" the cream cheese, a few stolen nibbles off the side where the filling had outgrown the crust, a day of refrigeration, and I present to you my Berrylicious Cheesecake!
For those of you that are interested, here is the recipe:

NEW YORK CHEESECAKE
2 cups Graham Cracker Crumbs
1/2 cup melted butter
2 tbsp sugar
4 packages of cream cheese (8oz/ea)
1 1/3 cups sugar
2 tbsp cornstarch
1 tbsp vanilla
3 eggs
1 cup sour cream
1) In a small bowl, toss together graham cracker crumbs, butter, and 2 tbsp sugar. Reserve 2 tablespoons of crumb mixture for garnish. Press remaining crumb mixture onto bottom and 2 1/4 inches up the sides of a 9" springform pan. Chill in freezer while preparing filling.
2) In a large mixing bowl, beat cream cheese with electric mixer (medium speed) until fluffy. Add 1 1/3 cups sugar, cornstarch and vanilla. Beat until combined. Add eggs, one at a time, beating until just combined after each one. Stir in sour cream.
3) Pour filling into crust. Baked at 325 degrees for 1 1/4 hours, or until center is almost set. Cool on wire rack for 15 minutes. Loosen sides of pan. Continue cooling on wire rack for 45 minutes more.
4) Sprinkle top with reserved crumb garnish. Refrigerate for at least 3 hours. Garnish as desired.