Showing posts with label daily tutorial. Show all posts

Wednesday, August 24, 2011

Daily Tutorial - Disappearing 9 patch quilt block

I'm not an expert quilter by any means, and the way I've been learning usually involves scouring the internet for tutorials that explain how I'm supposed to do things.  Sometimes I find what I'm looking for, sometimes I don't.  I was inspired, however, to see if I'm competent enough to create my own tutorials to help out the less experienced quilters (like myself) who may be on that internet search!

I did have a disappearing 9 patch block in mind when I bought the fabrics mentioned in my previous post.  I came across this block by accident but thought it was cute.  I believe it's also know as "9 to 4" because it starts life as a 9 patch, and ends up as 4 blocks.  I decided that I was going to use 5" squares for this, although you could make them bigger or smaller according to preference.

Step 1: Create the 9 patch
Choose your 9 squares to make into the 9 patch.  I have 5 corresponding fabrics, although there is no reason why you can't make this super scrappy and use completely different fabrics for each square.  For contrast, I've alternated the darker and lighter fabrics.
Step 2: Sew together
I started off by pairing the squares in the left column with the one next to them in the center column, right sides together.  I like to chain piece, which means I feed each pair through the sewing machine without breaking the thread.  Having sewn the first three pairs, I then opened them up and stacked the squares from the right column with each corresponding pair and repeated this again.  This results in 3 strips of 3 squares.
Step 3: Press and pin
It's now necessary to make a quick trip to the ironing board to press the seams.  The seams should be pressed in the direction of the darker fabric so that they don't show through.  The other helpful thing is that the seams end up pressed in opposite directions so that you can "lock" them together and match where the seams meet.  (This was probably the most helpful tip that I found after my very first patchwork attempt where my seams didn't match at all!)
Step 4: Pin and sew
Now that you have your strips pinned so that the seams match neatly, sew the 3 strips together, right sides facing to create your 9 patch.  Head back to the ironing board to press your seams and you should have a nice square.
Step 5: Cut the 9 patch into 4
Now the fun begins!  The plan is to cut your 9 patch into 4 blocks by cutting down the middle in both directions.  I've read that you can fold the 9 patch in half and finger press (i.e. run your fingers along the fabric to create a seam), then cut along that seam.  I decided to line everything up using the lines on my cutting mat to determine the center in each direction. 
Step 6: Rearrange!
What you should have now is 4 blocks that you can rotate and rearrange how you wish.  As you can see, the basic 9 patch when cut this way will give you a variety of interesting options, also making it look far more complicated than it was to create.  :)

Now that I have all my blocks sewn and cut, the next job for me is to arrange them all for the quilt top.  I picked this design because I enjoyed the slightly random nature of how the blocks can be put together, but I do struggle with the compulsion to make everything perfectly symmetrical and balanced.  So, I'm going to try and throw caution to the wind and not over-analyze the block placement!  Hopefully I'll have a finished quilt top to show you shortly...

Wednesday, May 11, 2011

Daily Tutorial - Recycling sweaters

For the last couple of years, I've been aware of a movement that is perfect for those of us on a budget but with a yarn habit - harvesting yarn from used sweaters.  There's plenty of discarded sweaters out there with luscious fibers, from merino wool to cashmere, that can be bought for a couple of dollars.  Buying enough yarn to make a sweater could easily cost $50 or more, whereas you can reclaim that same amount of yarn for under $5 by recycling that yarn from an existing sweater.  What you aren't saving is time, but many have said that they find the unraveling of sweaters to be quite soothing, so I guess you're also saving money on a therapist.

Upon coming across a box containing a couple of sweaters that I had purchased for the purpose of unraveling, and admittedly forgotten about, I wanted to share some guidelines.

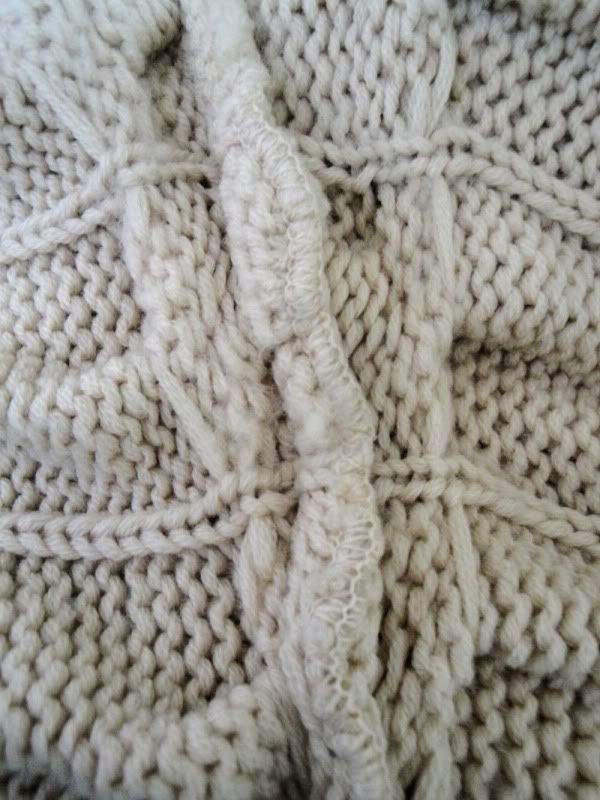
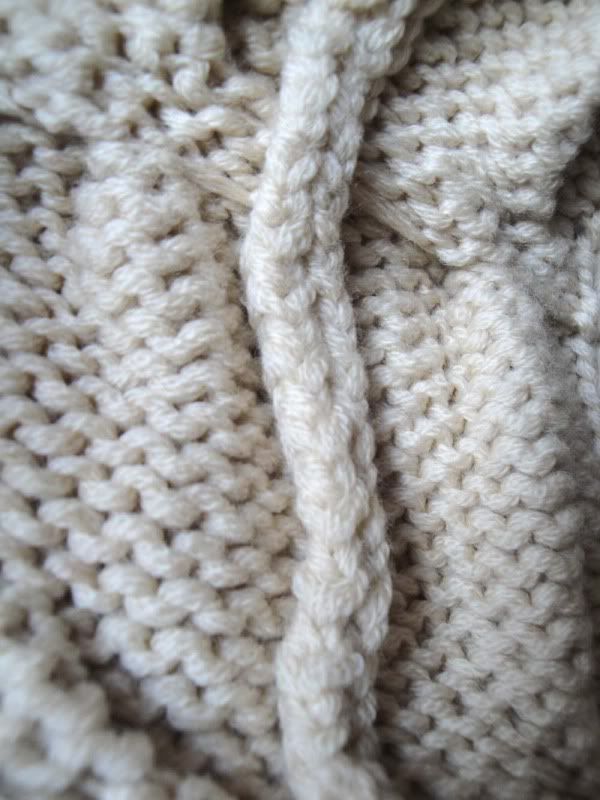
First thing's first - how do you pick a good sweater?  The most important thing to be aware of is the seams.

This is a bad seam. You can see that it's been serged, which means that any attempt to unravel it will generate short pieces of yarn the width of the sweater.
This is a good seam. You should be able to unravel a super long piece of yarn with this type of seam. If you inspect the seam by pulling it to one side, you should be able to see the thread used to sew the seam together.


The sweater that I used for this tutorial was a women's XL hoodie and actually had both good and bad seams.  The bad seams, however, were only at the shoulders so I was only going to lose a little bit of yarn during the unraveling process.

Another factor that I like to keep in mind is that the larger the sweater, the more yarn it will yield.  I highly suggest checking out men's sweaters too, because if you can score a men's XL in a nice fiber, you'll have a ton of yarn!

You should also carefully inspect the sweater for holes (in particular anything that looks like moth damage), stains, pilling, felted sections, etc.  

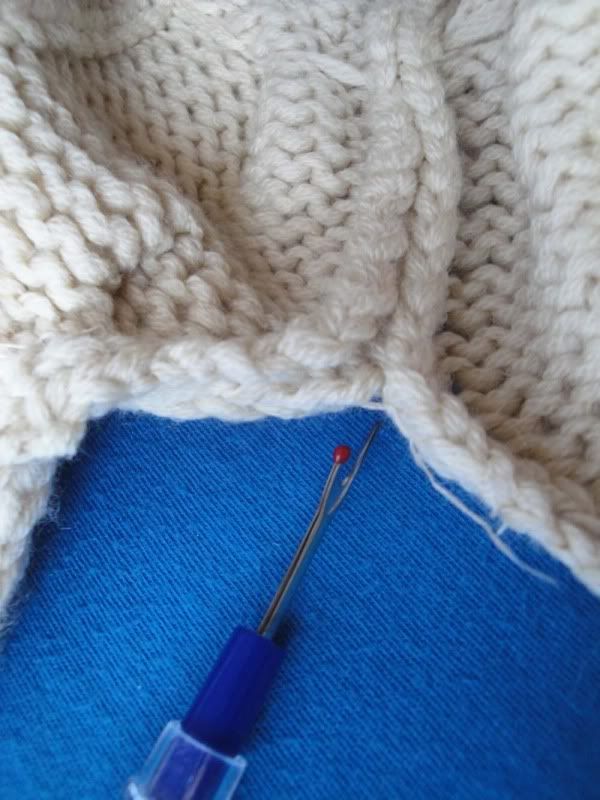
To start unraveling, you'll want to separate the seams for the sweater.  I usually start by separating the long side seams, then take off the sleeves, and moving up to the shoulders.  Starting at the bottom on one side, you should carefully locate and cut the thread that's holding the two seams together.  The very bottom is always the most fiddly in my opinion, seeing as that's where the yarn tails would also be woven in.  If you're lucky, once you've cut the thread, you'll find that it was a crocheted seam and pulling on it will unravel easily along the seam.  I often use scissors but also find that having a seam ripper on hand, for the more delicate cuts, is helpful.

Having separated all the seams, you can now start unraveling the yarn - and this is the fun part!  Most sweaters that I've found start unraveling at the top.  So, find where the yarn starts and just start pulling.  I tend to wind by hand into a ball, but you can also use a swift, ball winder, niddy noddy or whatever you find most convenient.

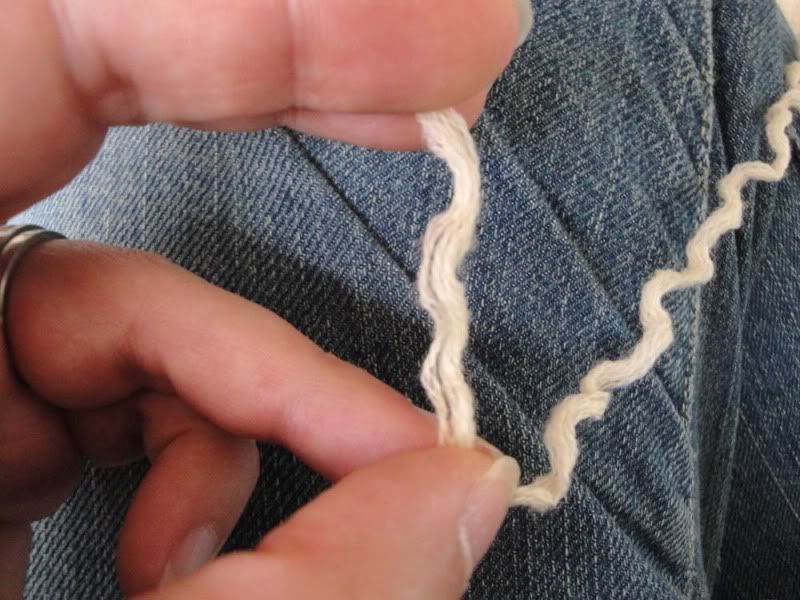
One thing I have found with commercial sweater yarns is that what looks like a worsted weight yarn is actually a collection of thinner yarns plied together.  As you can see here, this yarn was actually made up of about 8 strands of thinner yarn.  This makes no difference in terms of how you knit with it.  On occasion, I've gone nuts with my drop spindle and re-plied the threads back together or, if the sweater has produced very lightweight yarn, I've plied to create a denser yarn to my liking. 


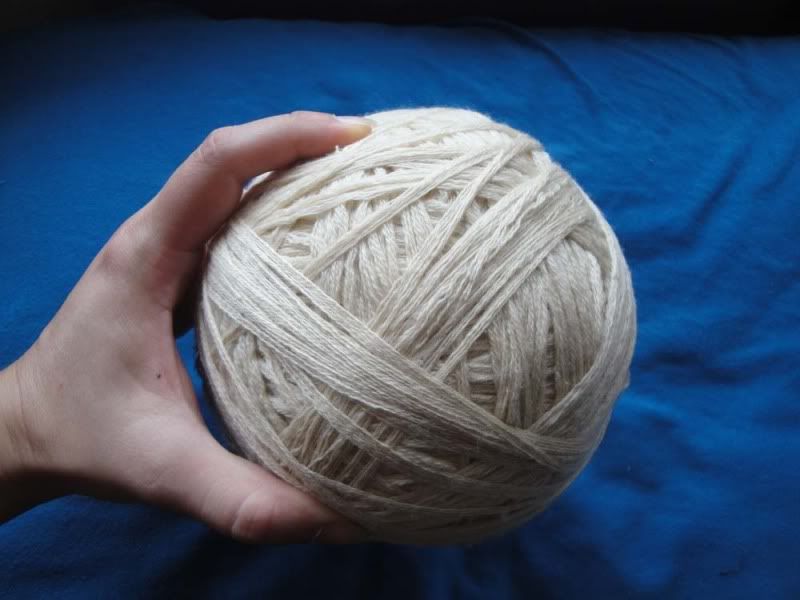
After a while, you end up with this.  I made this gigantic yarn ball from the front of the sweater, which came apart in one single length of yarn.  The beauty of it being that I still have the back and the sleeves to do!


To finish off the processing of your yarn, you will now need to wash it and "unkink" the yarn.  To wash it, it needs to be wound into hanks.  You don't want to wash it in the ball because it's best to clean all of the yarn evenly.  I usually soak the yarn in warm water with soap.  If the yarn is dirty, I'll do a couple of rinses to make sure the water is clear, but remember not to agitate the yarn as this may cause it to felt.  Once the yarn has been washed, it can then be hung to dry.  Some suggest putting a weight on the yarn to help stretch out the kinks, but I've found that this isn't necessary and prefer not to do it because I don't want the yarn to lose the elasticity and the kinks really make no difference to knitting with the yarn. 

Of course, there's nothing wrong with just buying cute sweaters at thrift stores with the intent to wear them as they are, but once you start looking at them with the purpose of unraveling, you may never look at sweater seams the same way ever again. 

Sunday, September 26, 2010

Daily Tutorial - A photo lightbox

While I have beautiful natural light in my house, which was one of the reasons we bought it, for the purposes of product photography I've been finding that relying on the natural light just isn't enough.  Seeing as I'm at work during the majority of the daylight hours during the week, that leaves me limited to taking pictures on the weekend, and which window I set up by depends on what time of day it is.  For that reason, I decided it was time to make a light tent so that I can take consistent pictures, no matter what time of day (or night).

There's a lot of light boxes/tents that you can buy, but if you're on a budget, they're also pretty simple to make at home.  I looked up a variety of tutorials, lots of which involved constructing a frame using PVC piping, or cutting up a sturdy box, then using white fabric or tissue to diffuse the light.  With these tutorials in mind, I developed my own plan for a simple (and inexpensive) light tent.
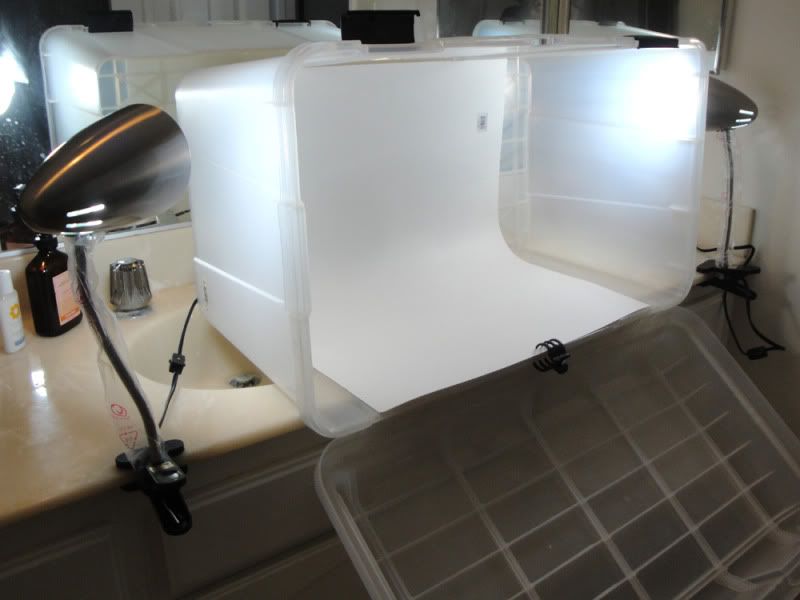
I opted to use a frosted white plastic storage container that I already had, therefore there was no construction involved (and less chance of me chopping off a finger by accident!)  The lamps are clip desk lamps that I found at Bed Bath & Beyond on sale for $5 each.  They only had 2 left in stock, so I am planning to go get a third to provide downward light some time this week.  The card stock was purchased at the Dollar Tree - 2 sheets for $1.  The most expensive individual cost was the bulbs for the lamps as I bought a set of energy efficient "daylight" bulbs to give light as close to a clean white as possible.  Total cost?  Just under $20.

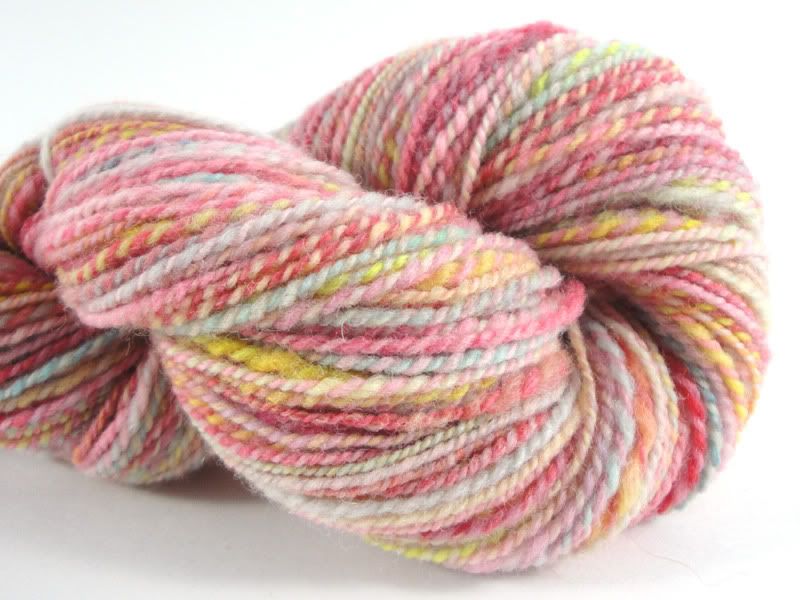
For a test run, and using my point and shoot on automatic settings (but without the flash), I decided to take some test shots.  I'm already pretty happy with how these turned out and I know that once I have the third lamp shining downward, and I start using my DSLR (on a tripod), I'll be able to produce some really nice shots with a minimal amount of editing required, if any!