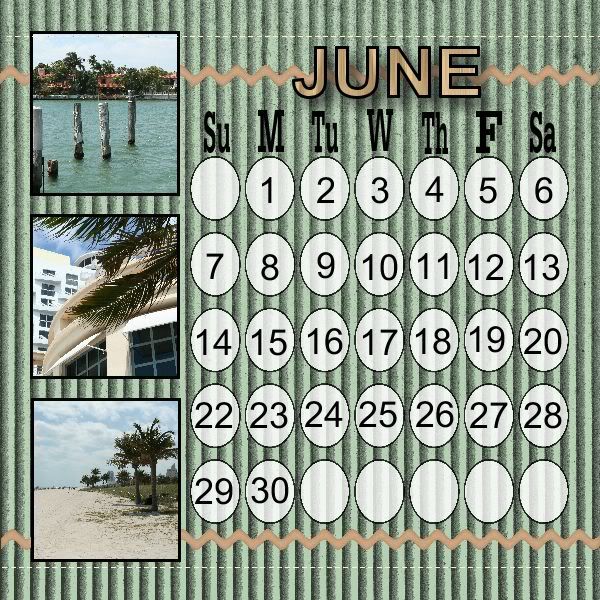
Congratulations to knitterpixie, who has won a copy of the My Memories Digital Scrapbooking Suite. I hope you enjoy playing around with it!
Don't forget, I do have a coupon code that you can use if you'd like to purchase the product. It gives you $10 off the purchase of the software ($39.98 retail), plus an additional $10 to spend on scrapbooking elements in the store. Enter code STMMMS90189 at checkout.
Thanks to everyone for dropping by to enter!
Wednesday, September 7, 2011
Monday, September 5, 2011
Daily Giveaway - A quick reminder
How has your Labor Day weekend been going? Yesterday, we made an impromptu visit to Six Flags Magic Mountain - which led to a bruised rib and a small harness rash. Totally worth it (although I do remember the days when going to a theme park didn't result in feeling quite so beaten up!) There were some amazing rollercoasters, but the most entertaining part of the day had to be getting soaked head-to-toe on the log ride. My friends' 21-month old didn't seem to bothered by it at least.
Anyway, if you haven't yet entered, just a quick reminder to submit a comment for your chance to win the My Memories digital scrapbook software giveaway. I've been playing with the software even more over the last week, and it is very versatile and fun to use. I'll be picking the winner tomorrow afternoon.
Share your Labor Day stories with me! Did you get to enjoy the long weekend?
Anyway, if you haven't yet entered, just a quick reminder to submit a comment for your chance to win the My Memories digital scrapbook software giveaway. I've been playing with the software even more over the last week, and it is very versatile and fun to use. I'll be picking the winner tomorrow afternoon.
Share your Labor Day stories with me! Did you get to enjoy the long weekend?
Thursday, September 1, 2011
Daily Deuce - Happy Birthday Deuce!
It wouldn't be right to forgo wishing Deuce a Happy Birthday today - after all, I named this blog after the little fuzzbutt!
~~~~~~~~~~~~~~~~~~~~~~~~~~~~~~
Tuesday, August 30, 2011
Daily Giveaway - My Memories Suite
If you haven't had a chance to check out my review of the My Memories Suite for digital scrapbooking, go ahead and take a look. In the meantime, I'm happy to say that My Memories is sponsoring a giveaway so that one of you can win a copy of the software ($39.97 retail value) and enjoy the chance to do some digital scrapbooking of your own!
You have two chances to enter:
1) Just leave a comment. You can just say hi, or tell me something about yourself, or what you're going to eat for dinner. You get the idea.
2) For a second entry, go to the My Memories website and leave another comment telling me which is your favorite scrapbooking kit or template.
Please make sure that you leave contact information with your comments so that I can get hold of you if you win. Of course, if you'd like to become a follower of my blog, I'd love to have you. :)
This giveaway will run until next Tuesday (Sept. 6) when I will let the random number generator pick the winner.
But wait, there's more!
If you're interested in buying the software, I also have a coupon code that you can use which gives you $10 off the purchase of the software, plus an additional $10 to spend in the store. Just enter coupon code STMMMS90189 at checkout to take advantage of this deal.
Monday, August 29, 2011
Daily Review - My Memories Digital Scrapbooking
I'll admit that when it comes to scrapbooking, I always have the best intentions, but never quite get around to it. When photo printing companies started offering the option to print books, I was thrilled because it is much faster than creating a paper scrapbook and means I'll actually get it done (rather than having the printed photos in a drawer for all eternity!) As I mentioned in this review, however, my problem with the digital scrapbooking software with the bigger photo-book printers is that their templates and backgrounds can be somewhat limiting.
Last week, I found out about My Memories, which offers digital scrapbooking software to completely customize your digital scrapbook page creation. The folks there were nice enough to provide me with a copy of the My Memories Suite to test out and review.
The basics
When I first opened up the software, I liked how everything was easy to access and found it user friendly. My biggest problem was being somewhat overwhelmed by all the various options available to me! To start off, The software gives you a variety of choices for your page size so that you can create something that's easy to print or upload to create a book. You can then choose to use one of the pre-loaded templates, or create your own design from scratch. If you are looking to include all photos from a set, you can let the software auto-fill your album, or you can drag and drop each photo into place yourself. Double clicking on the photo allows you to crop it as you want it to look. Another feature that I like is that you can alter the photos from within the My Memories software - so if you've place the photo on the page but think you'd prefer it in B&W or sepia, a couple of clicks and you're done, without needing other software.
Everything is broken down by category - from backgrounds to word art, text to embellishments. To access and edit each of the different areas, there are buttons available on the left, right and top of the screen. Each item that you add is placed onto the page that you're building, which then allows you to resize, move, copy, and place in the perfect spot.
Add-ons
Additional kits are available on the website with a nice selection to fit a wide variety of occasions and themes. Some add-on kits have backgrounds and themes, while others contain monograms and word art. I think I'll be making use of the calendar grids so that I can make my own calendars with ease. I like that there is a collection of kits available for free, or as low as $0.99, with more expensive kits priced up to $9.99. A selection of kits are also available for a discounted price as weekly deals, or you can sign up for the design club, which offers 5 exclusive kit downloads each month for a $5.99 membership fee. Considering a pack of regular scrapbooking paper can be $20, I think the kits are well priced (and of course reusable!) The downloads are also able to be used with Photoshop, or other photo editing software.
Sharing
As well as allowing you print pages, I also enjoy that the pages can be exported as jpegs for easy sharing in digital format. Personally, I like to send a holiday greeting via e-mail - especially to family members overseas. This software allows the addition of music, video, or links into the scrapbook page which almost makes your page an interactive experience! Alternatively, you could create an entire album that can be shared digitally with friends and family.
Best features
For me, the best feature of this software is that everything is customizable so that you're not restricted by layout (as is often the case with online photo book design). Photo layouts can be moved and re-sized to your personal needs; so even if the template has fewer photo openings on a page than you want, it's easy to add more, then move or rotate them as much as you want. Really, the options for what can be done with this are endless so there are no limits to your creativity.
While the software may seem a little intimidating at first, once you have an idea of where everything is, it's really very easy to navigate. I suspect I'll be spending more time exploring everything before I'm completely comfortable, but I know that I'll be putting this software to really good use and I'm excited to create my next photo book using it!
My Memories was kind enough to also provide a copy of the My Memories Suite for me to give away to one of you, so check back tomorrow for giveaway details!
Last week, I found out about My Memories, which offers digital scrapbooking software to completely customize your digital scrapbook page creation. The folks there were nice enough to provide me with a copy of the My Memories Suite to test out and review.
The basics
When I first opened up the software, I liked how everything was easy to access and found it user friendly. My biggest problem was being somewhat overwhelmed by all the various options available to me! To start off, The software gives you a variety of choices for your page size so that you can create something that's easy to print or upload to create a book. You can then choose to use one of the pre-loaded templates, or create your own design from scratch. If you are looking to include all photos from a set, you can let the software auto-fill your album, or you can drag and drop each photo into place yourself. Double clicking on the photo allows you to crop it as you want it to look. Another feature that I like is that you can alter the photos from within the My Memories software - so if you've place the photo on the page but think you'd prefer it in B&W or sepia, a couple of clicks and you're done, without needing other software.
Everything is broken down by category - from backgrounds to word art, text to embellishments. To access and edit each of the different areas, there are buttons available on the left, right and top of the screen. Each item that you add is placed onto the page that you're building, which then allows you to resize, move, copy, and place in the perfect spot.
Add-ons
Additional kits are available on the website with a nice selection to fit a wide variety of occasions and themes. Some add-on kits have backgrounds and themes, while others contain monograms and word art. I think I'll be making use of the calendar grids so that I can make my own calendars with ease. I like that there is a collection of kits available for free, or as low as $0.99, with more expensive kits priced up to $9.99. A selection of kits are also available for a discounted price as weekly deals, or you can sign up for the design club, which offers 5 exclusive kit downloads each month for a $5.99 membership fee. Considering a pack of regular scrapbooking paper can be $20, I think the kits are well priced (and of course reusable!) The downloads are also able to be used with Photoshop, or other photo editing software.
Sharing
As well as allowing you print pages, I also enjoy that the pages can be exported as jpegs for easy sharing in digital format. Personally, I like to send a holiday greeting via e-mail - especially to family members overseas. This software allows the addition of music, video, or links into the scrapbook page which almost makes your page an interactive experience! Alternatively, you could create an entire album that can be shared digitally with friends and family.
Best features
For me, the best feature of this software is that everything is customizable so that you're not restricted by layout (as is often the case with online photo book design). Photo layouts can be moved and re-sized to your personal needs; so even if the template has fewer photo openings on a page than you want, it's easy to add more, then move or rotate them as much as you want. Really, the options for what can be done with this are endless so there are no limits to your creativity.
While the software may seem a little intimidating at first, once you have an idea of where everything is, it's really very easy to navigate. I suspect I'll be spending more time exploring everything before I'm completely comfortable, but I know that I'll be putting this software to really good use and I'm excited to create my next photo book using it!
My Memories was kind enough to also provide a copy of the My Memories Suite for me to give away to one of you, so check back tomorrow for giveaway details!
Wednesday, August 24, 2011
Daily Tutorial - Disappearing 9 patch quilt block
I'm not an expert quilter by any means, and the way I've been learning usually involves scouring the internet for tutorials that explain how I'm supposed to do things. Sometimes I find what I'm looking for, sometimes I don't. I was inspired, however, to see if I'm competent enough to create my own tutorials to help out the less experienced quilters (like myself) who may be on that internet search!
I did have a disappearing 9 patch block in mind when I bought the fabrics mentioned in my previous post. I came across this block by accident but thought it was cute. I believe it's also know as "9 to 4" because it starts life as a 9 patch, and ends up as 4 blocks. I decided that I was going to use 5" squares for this, although you could make them bigger or smaller according to preference.
Now that I have all my blocks sewn and cut, the next job for me is to arrange them all for the quilt top. I picked this design because I enjoyed the slightly random nature of how the blocks can be put together, but I do struggle with the compulsion to make everything perfectly symmetrical and balanced. So, I'm going to try and throw caution to the wind and not over-analyze the block placement! Hopefully I'll have a finished quilt top to show you shortly...
I did have a disappearing 9 patch block in mind when I bought the fabrics mentioned in my previous post. I came across this block by accident but thought it was cute. I believe it's also know as "9 to 4" because it starts life as a 9 patch, and ends up as 4 blocks. I decided that I was going to use 5" squares for this, although you could make them bigger or smaller according to preference.
| Step 1: Create the 9 patch Choose your 9 squares to make into the 9 patch. I have 5 corresponding fabrics, although there is no reason why you can't make this super scrappy and use completely different fabrics for each square. For contrast, I've alternated the darker and lighter fabrics. | |
| Step 2: Sew together I started off by pairing the squares in the left column with the one next to them in the center column, right sides together. I like to chain piece, which means I feed each pair through the sewing machine without breaking the thread. Having sewn the first three pairs, I then opened them up and stacked the squares from the right column with each corresponding pair and repeated this again. This results in 3 strips of 3 squares. | |
| Step 3: Press and pin It's now necessary to make a quick trip to the ironing board to press the seams. The seams should be pressed in the direction of the darker fabric so that they don't show through. The other helpful thing is that the seams end up pressed in opposite directions so that you can "lock" them together and match where the seams meet. (This was probably the most helpful tip that I found after my very first patchwork attempt where my seams didn't match at all!) | |
| Step 4: Pin and sew Now that you have your strips pinned so that the seams match neatly, sew the 3 strips together, right sides facing to create your 9 patch. Head back to the ironing board to press your seams and you should have a nice square. | |
| Step 5: Cut the 9 patch into 4 Now the fun begins! The plan is to cut your 9 patch into 4 blocks by cutting down the middle in both directions. I've read that you can fold the 9 patch in half and finger press (i.e. run your fingers along the fabric to create a seam), then cut along that seam. I decided to line everything up using the lines on my cutting mat to determine the center in each direction. | |
| Step 6: Rearrange! What you should have now is 4 blocks that you can rotate and rearrange how you wish. As you can see, the basic 9 patch when cut this way will give you a variety of interesting options, also making it look far more complicated than it was to create. :) |
Now that I have all my blocks sewn and cut, the next job for me is to arrange them all for the quilt top. I picked this design because I enjoyed the slightly random nature of how the blocks can be put together, but I do struggle with the compulsion to make everything perfectly symmetrical and balanced. So, I'm going to try and throw caution to the wind and not over-analyze the block placement! Hopefully I'll have a finished quilt top to show you shortly...
Tuesday, August 23, 2011
Daily Craft - Quilting plans
Joann's is doing a pretty good sale on their Quilters Showcase cottons right now ($2.49/yd), so I wanted to go check out what they have. One thing that was really impressive, for the novice quilter like me, is that Joann's has designed this line so that certain fabrics very obviously go together, using the same colors and tones. I was able to grab a fabric that called to me, and from there it was very easy to select the complimentary designs. The hardest part was actually narrowing down the fabrics to the ones that I wanted because there's quite a bit of choice! I'm also learning to calculate the amount of fabric needed and, after scrawling down a bunch of basic calculations, I think I had it figured out (with excess built in just in case I got it completely wrong).
Now that I have the fabric for 2 quilts In hand, there's no excuses for not getting to work on this I guess. I'm really happy with what I picked and I'm hopeful that they'll look really nice when I'm done. I've decided to try the disappearing 9-patch block, so more on that to come...
Subscribe to:
Posts
(
Atom
)