For any of you who ever go to Big Lots, you probably know that you can find some very random things. Most recently, I found some fabric charm packs on sale for $3. I grabbed a couple, although wishing now that I'd purchased more - as with any overstock type store, you can never guarantee that the item will be there if you return at a later date.
I decided to dive right in using a simple quilt pattern to showcase the charm pack. It's coming together quite quickly, so I'll have more to show for it soon. My only problem is that I enjoy making the patchwork tops, but don't love the quilting part (seeing as I already have another quilt top waiting to be quilted in the closet).
Do any of you quilters have that issue...or any suggestions on how to get over the quilting hump?
Showing posts with label quilting. Show all posts
Thursday, September 13, 2012
Wednesday, January 18, 2012
Daily Review - City Quilts
I was really excited to discover that the book "City Quilts" by Cherri House is now available in my local library. When I first heard about the book, I had a suspicion that it would appeal to me and, WOW, was I right! Prior to this, I've never opened a pattern book of any kind before and actually wanted to make every single one of the designs inside. City Quilts for the win.
While I'm still very much a beginning quilter, I've already concluded that simple blocks with bold colors appeal the most to me right now. Not that I don't admire more country-style quilting, but I'm an urban girl at heart. City Quilts ties together traditional blocks with a modern twist, also adding a fabulous sense of color. I particularly liked how she uses solid colors to highlight the designs - perfect for someone like me who gets easily confused about whether patterned fabrics look too busy together. I very much enjoyed looking over the section within the book discussing color, including examples of various color schemes, shades and tones. While I love the color schemes that she uses for the designs in this book, I can visualize how switching the color scheme would produce a completely different (but equally striking) effect.
The patterns themselves are very easy to follow, with clear directions and diagrams to help with block assembly and construction. I'm sure that some of the information is probably unnecessary for more experienced quilters, but I know that I appreciate the reminders on how to do things, which way to press seams and so on. There is actually a wealth of technique discussed in the book, which allows it to be a stand-alone guide for this particular quilting journey. I appreciated Cherri's discussion on how she designs and gathers her inspiration. It makes me feel like I can do the same (although I'm also sure I'm not there just yet myself!)
So, in summary....
- I would make all of these quilts!
- This holds a lot of appeal for a beginner like me who has somewhat mastered the rotary cutter and can sew in straight lines
- Makes me think about traditional quilt blocks in a new light
- Really highlights how fancy patterned fabrics aren't necessary for a truly striking end result
- Easy to follow with nice discussion of various techniques along the way
Having gone through this book, I'm also happy to say that I've now decided how I want to quilt the top, which has been hibernating in a plastic bag since I finished piecing it together late last year. I couldn't decide on which would be the best color thread to quilt with, or if the design I had in my head made any sense. This book has given me the confidence to go with my instinct - let's hope it works out!
While I'm still very much a beginning quilter, I've already concluded that simple blocks with bold colors appeal the most to me right now. Not that I don't admire more country-style quilting, but I'm an urban girl at heart. City Quilts ties together traditional blocks with a modern twist, also adding a fabulous sense of color. I particularly liked how she uses solid colors to highlight the designs - perfect for someone like me who gets easily confused about whether patterned fabrics look too busy together. I very much enjoyed looking over the section within the book discussing color, including examples of various color schemes, shades and tones. While I love the color schemes that she uses for the designs in this book, I can visualize how switching the color scheme would produce a completely different (but equally striking) effect.
The patterns themselves are very easy to follow, with clear directions and diagrams to help with block assembly and construction. I'm sure that some of the information is probably unnecessary for more experienced quilters, but I know that I appreciate the reminders on how to do things, which way to press seams and so on. There is actually a wealth of technique discussed in the book, which allows it to be a stand-alone guide for this particular quilting journey. I appreciated Cherri's discussion on how she designs and gathers her inspiration. It makes me feel like I can do the same (although I'm also sure I'm not there just yet myself!)
So, in summary....
- I would make all of these quilts!
- This holds a lot of appeal for a beginner like me who has somewhat mastered the rotary cutter and can sew in straight lines
- Makes me think about traditional quilt blocks in a new light
- Really highlights how fancy patterned fabrics aren't necessary for a truly striking end result
- Easy to follow with nice discussion of various techniques along the way
Having gone through this book, I'm also happy to say that I've now decided how I want to quilt the top, which has been hibernating in a plastic bag since I finished piecing it together late last year. I couldn't decide on which would be the best color thread to quilt with, or if the design I had in my head made any sense. This book has given me the confidence to go with my instinct - let's hope it works out!
Tuesday, September 20, 2011
Daily Craft - Squares and strips
I think I finally narrowed down the design that I want to use for my
next quilt, and started cutting all the squares and strips last night.
It's really quite satisfying to sit down with the rotary cutter and end
up with neat little stacks of fabric, ready to be sewn.
Now that I've started cutting and looked at the fabric patterns together, I've concluded that I need some plain colors mixed in to make each individual pattern really pop. The patterns together as I have them now will be just a little bit too crazy! Of course, buying additional fabric means I could end up making this a really big quilt...or perhaps two smaller ones would make this process more manageable. I'm still deciding if I want to do the plain fabrics in just white, black and grey, or if adding a matching teal (assuming I can find a perfect match) will be too much. Sometimes I think I just have too many ideas all at once - decisions, decisions!
Thursday, September 8, 2011
Daily Craft - Finished disappearing 9-patch
Firstly, I should say that trying to photograph a quilt is kind of a pain in the ass. I checked out a few websites, which advocated photographing the entire thing in natural light at a 90-degree angle in order to avoid any bizarre trapezoid-looking quilts. Of course, finding a way to hang it where you can place the tripod at a 90-degrees is a mission upon itself. I finally figured out that I could achieve this using some skirt hangers and the door frame - not perfect (because I still picked up a weird shadow from somewhere), but I'm glad that I can now share a photo of my finished piece!
So, here it is - my Disappearing 9-patch quilt...
I really enjoy how it looks random, even though there was actually a decent amount of "organizing" the blocks. Truth is, I'm not very good at being completely random! This is also the first time attempting to do binding properly, which is something I definitely plan on practicing more. Overall, I'm very happy with my accomplishments and I keep telling myself that the only person who is likely to notice the imperfections is me anyway. The colors in the shot below are more true to life, and also show the simple quilting that I did around each block.
I have to give props to Joann for this line of fabric. I can't wait to get started on the next quilt with the other fabrics that I bought, although still haven't decided upon the block pattern to use.
So, here it is - my Disappearing 9-patch quilt...
I really enjoy how it looks random, even though there was actually a decent amount of "organizing" the blocks. Truth is, I'm not very good at being completely random! This is also the first time attempting to do binding properly, which is something I definitely plan on practicing more. Overall, I'm very happy with my accomplishments and I keep telling myself that the only person who is likely to notice the imperfections is me anyway. The colors in the shot below are more true to life, and also show the simple quilting that I did around each block.
I have to give props to Joann for this line of fabric. I can't wait to get started on the next quilt with the other fabrics that I bought, although still haven't decided upon the block pattern to use.
Wednesday, August 24, 2011
Daily Tutorial - Disappearing 9 patch quilt block
I'm not an expert quilter by any means, and the way I've been learning usually involves scouring the internet for tutorials that explain how I'm supposed to do things. Sometimes I find what I'm looking for, sometimes I don't. I was inspired, however, to see if I'm competent enough to create my own tutorials to help out the less experienced quilters (like myself) who may be on that internet search!
I did have a disappearing 9 patch block in mind when I bought the fabrics mentioned in my previous post. I came across this block by accident but thought it was cute. I believe it's also know as "9 to 4" because it starts life as a 9 patch, and ends up as 4 blocks. I decided that I was going to use 5" squares for this, although you could make them bigger or smaller according to preference.
Now that I have all my blocks sewn and cut, the next job for me is to arrange them all for the quilt top. I picked this design because I enjoyed the slightly random nature of how the blocks can be put together, but I do struggle with the compulsion to make everything perfectly symmetrical and balanced. So, I'm going to try and throw caution to the wind and not over-analyze the block placement! Hopefully I'll have a finished quilt top to show you shortly...
I did have a disappearing 9 patch block in mind when I bought the fabrics mentioned in my previous post. I came across this block by accident but thought it was cute. I believe it's also know as "9 to 4" because it starts life as a 9 patch, and ends up as 4 blocks. I decided that I was going to use 5" squares for this, although you could make them bigger or smaller according to preference.
| Step 1: Create the 9 patch Choose your 9 squares to make into the 9 patch. I have 5 corresponding fabrics, although there is no reason why you can't make this super scrappy and use completely different fabrics for each square. For contrast, I've alternated the darker and lighter fabrics. | |
| Step 2: Sew together I started off by pairing the squares in the left column with the one next to them in the center column, right sides together. I like to chain piece, which means I feed each pair through the sewing machine without breaking the thread. Having sewn the first three pairs, I then opened them up and stacked the squares from the right column with each corresponding pair and repeated this again. This results in 3 strips of 3 squares. | |
| Step 3: Press and pin It's now necessary to make a quick trip to the ironing board to press the seams. The seams should be pressed in the direction of the darker fabric so that they don't show through. The other helpful thing is that the seams end up pressed in opposite directions so that you can "lock" them together and match where the seams meet. (This was probably the most helpful tip that I found after my very first patchwork attempt where my seams didn't match at all!) | |
| Step 4: Pin and sew Now that you have your strips pinned so that the seams match neatly, sew the 3 strips together, right sides facing to create your 9 patch. Head back to the ironing board to press your seams and you should have a nice square. | |
| Step 5: Cut the 9 patch into 4 Now the fun begins! The plan is to cut your 9 patch into 4 blocks by cutting down the middle in both directions. I've read that you can fold the 9 patch in half and finger press (i.e. run your fingers along the fabric to create a seam), then cut along that seam. I decided to line everything up using the lines on my cutting mat to determine the center in each direction. | |
| Step 6: Rearrange! What you should have now is 4 blocks that you can rotate and rearrange how you wish. As you can see, the basic 9 patch when cut this way will give you a variety of interesting options, also making it look far more complicated than it was to create. :) |
Now that I have all my blocks sewn and cut, the next job for me is to arrange them all for the quilt top. I picked this design because I enjoyed the slightly random nature of how the blocks can be put together, but I do struggle with the compulsion to make everything perfectly symmetrical and balanced. So, I'm going to try and throw caution to the wind and not over-analyze the block placement! Hopefully I'll have a finished quilt top to show you shortly...
Tuesday, August 23, 2011
Daily Craft - Quilting plans
Joann's is doing a pretty good sale on their Quilters Showcase cottons right now ($2.49/yd), so I wanted to go check out what they have. One thing that was really impressive, for the novice quilter like me, is that Joann's has designed this line so that certain fabrics very obviously go together, using the same colors and tones. I was able to grab a fabric that called to me, and from there it was very easy to select the complimentary designs. The hardest part was actually narrowing down the fabrics to the ones that I wanted because there's quite a bit of choice! I'm also learning to calculate the amount of fabric needed and, after scrawling down a bunch of basic calculations, I think I had it figured out (with excess built in just in case I got it completely wrong).
Now that I have the fabric for 2 quilts In hand, there's no excuses for not getting to work on this I guess. I'm really happy with what I picked and I'm hopeful that they'll look really nice when I'm done. I've decided to try the disappearing 9-patch block, so more on that to come...
Saturday, July 2, 2011
Daily Craft - Some recent ventures!
The problem with having so many crafts at my disposal is deciding what to make on any given day. Some things can be made pretty quickly, allowing me the chance to hop between crafts in a single sitting. Other things are a much larger time investment. Recently, I've been tempted by the quicker items - instant gratification for sure. I've also been trying to build a decent inventory for my online shop, so it can be hard to find a balance between bigger pieces and a nice offering of smaller things to enjoy. The most important thing though is that I'm still enjoying what I'm making as I'm of the opinion crafting shouldn't be a chore. My most recent offerings were made in the same night, and are very different, but each fun to make in their own way.
First up is this pair of cluster/dangle earrings. I'm a little obsessed with these cluster-type earrings. It allows me to play with different beads that compliment each other, and they're just so cute! I used a collection of glass beads, each with a slightly different color, shimmer, or size, all hanging from a silver chain.
I named this pair Brenna, which comes from my Welsh heritage and love of Welsh names. I find the names so lyrical, therefore decided to keep the Welsh theme for all my jewelry pieces.
Then I made these quilted coasters using fabric scraps. I'm not usually into floral prints, but this particular print is so bold - with the pops of bright red for contrast - that I fell in love with it the minute I saw it. The only thing I'm sad about is not having much more of the fabric at hand seeing as it was a remnant to begin with. The coasters are a simple but effective design and there is something very therapeutic about creating the quilted design for each.
Not sure what I'm itching to make next but it's like a food craving and changes from day to day! Are you multi-craftal (yes, I'm making up words)? How do you find time for each of your crafts?
Monday, January 17, 2011
Daily Craft - Shiny things
Where have I been you ask? I was well and truly hit by my first cold of 2011. Urgh! It never really settled in my face (which I appreciate because there's nothing less attractive than looking like a puffy sniveling mess for days on end) but decided to inhabit my chest instead (as if coughing like a walrus is much better). With it being husband's birthday this week, my primary goal was to not get him sick, seeing as that would have been a horrible birthday gift.
What I did manage to do, while recuperating in the house, is a bunch of crafty business! I borrowed a couple of quilting books from the library last week, one of which was Last-Minute Patchwork + Quilted Gifts
. I decided to give the coasters from the book a shot with some random fabric laying about from one of my thrift store hauls. These are so quick and easy to do and a perfect way to stash bust / make quick and easy gifts. I think I'll be making many more of these.
Yesterday, in an attempt to get out of the house for a little bit, I went off to investigate a local Indian Grocery store ( for which a Daily Dish feature may well appear shortly...) On the way back, I decided to check out the Michael's sale and snatched up a ton of jewelry supplies on sale and clearance. I am now a fan of a couple of newly discovered component lines - Blue Moon "Orient Express", and Plaid's "Forged". I just love some of the things that these lines offer and will definitely be buying more. I'm a total earring addict so that's always my first thought when deciding to make jewelry. Here are my efforts from last night with my new purchases.
Have you tried either of those component brands? Would love to hear your opinions. Also, which of the earrings are you favorite?
What I did manage to do, while recuperating in the house, is a bunch of crafty business! I borrowed a couple of quilting books from the library last week, one of which was Last-Minute Patchwork + Quilted Gifts
Tuesday, December 28, 2010
Daily Craft - Buzz Lightyear, a quilt for a Space Ranger!
Months ago, after I finished my first patchwork blanket, husband suggested to me that I make a quilt for our nephew for Christmakah. Armed with a minimal amount of online research on how to make a quilt, I set off to find some fabric that would be suitable for a 2 year old boy. He loves trains and that was my original plan but wasn't impressed by any of the train fabric I found. Just as I was starting to lose hope, I happened across Buzz Lightyear and knowing that our nephew is a big fan, I knew I had to go for it.
So, here's my Space Ranger quilt - slightly wonky but made with love. If nothing else, I'm just really happy that all the corners for my squares matched up. I was told that, when this gift was opened, our nephew was happy to sit on it and informed his mom that his gift was better than hers. Now if that's not a 2-year old seal of approval, not sure what is!
- Be careful with choice of fabric. My biggest mistake was picking fabric that was a little slippery to work with (for the striped blocks) and it would have been neater had a picked a more sturdy fabric.
- Get happy with the iron!
- When sewing blocks/strips together, if the seams have been properly pressed to the appropriate side, they "lock" together in the right spot, which really helps with matching corners.
- Don't try to sew strips together late at night when you're tired. You may find that you pin and sew the strips upside down and have to pick apart the entire seam immediately after.
- There is no such thing as too many pins.
- Making a quilt sandwich requires a lot of space and is a total pain in the derrière (when you only kind of know what you're doing that is).
- Carefully read/write down instructions on how to machine bind a quilt. Don't do what I did and think you remember what you're supposed to do because it will invariably lead to frustration and sweating.
- Be happy with the end result even if it's not perfect - after all, it can only get better right?
So, here's my Space Ranger quilt - slightly wonky but made with love. If nothing else, I'm just really happy that all the corners for my squares matched up. I was told that, when this gift was opened, our nephew was happy to sit on it and informed his mom that his gift was better than hers. Now if that's not a 2-year old seal of approval, not sure what is!
Things I learned during the making of this quilt (for all the novice quilters like me):
- Do get a rotary cutter and learn to use it accurately.- Be careful with choice of fabric. My biggest mistake was picking fabric that was a little slippery to work with (for the striped blocks) and it would have been neater had a picked a more sturdy fabric.
- Get happy with the iron!
- When sewing blocks/strips together, if the seams have been properly pressed to the appropriate side, they "lock" together in the right spot, which really helps with matching corners.
- Don't try to sew strips together late at night when you're tired. You may find that you pin and sew the strips upside down and have to pick apart the entire seam immediately after.
- There is no such thing as too many pins.
- Making a quilt sandwich requires a lot of space and is a total pain in the derrière (when you only kind of know what you're doing that is).
- Carefully read/write down instructions on how to machine bind a quilt. Don't do what I did and think you remember what you're supposed to do because it will invariably lead to frustration and sweating.
- Be happy with the end result even if it's not perfect - after all, it can only get better right?
Monday, December 13, 2010
Daily Ramblings - Beginning to look a lot like...
The tree has now been up for a few days and so far no ornament disasters. Last year, baby cat Deuce was a little too small for the ornaments to be of concern. This year though, I know he can reach 3ft up the tree if he wants to. I made the decision to go all plastic on the ornaments, just in case he decides to attempt to steal any, which would have resulted in shattered glass and probably a trip to the vet. He took it upon himself to sniff the tree when I first put it up, checked if it was edible (because that plastic taste is yummy) but has since left it alone.
I'm also excited to say that I finally finished all my holiday shopping. In my attempt to bring in all the bags from the car yesterday afternoon, I successfully dropped a heavy-ish gift on the top of my foot. The only good thing about that is knowing that if I hadn't dropped it on my foot, I probably would have broken it. Broken gift or broken foot - not sure which is preferable to be honest!
I'm an hour of sewing away from finishing up my one large handmade Christmakah gift too. Deuce loves to help me by holding the end of whatever fabric I'm cutting. He then watches me (for quality control purposes I'm sure). I'm not 100% happy with how the quilt is shaping up but I'm such a quilting novice that I guess I'm just grateful it's a rectangle really! Actually, I've been having a lot of trouble with the fabric being somewhat slippery. Note to self - buy stiffer fabric until I get the hang of this quilting business.
I think I shall name him "inspector #1" while he's in my craft room.
I'm also excited to say that I finally finished all my holiday shopping. In my attempt to bring in all the bags from the car yesterday afternoon, I successfully dropped a heavy-ish gift on the top of my foot. The only good thing about that is knowing that if I hadn't dropped it on my foot, I probably would have broken it. Broken gift or broken foot - not sure which is preferable to be honest!
I'm an hour of sewing away from finishing up my one large handmade Christmakah gift too. Deuce loves to help me by holding the end of whatever fabric I'm cutting. He then watches me (for quality control purposes I'm sure). I'm not 100% happy with how the quilt is shaping up but I'm such a quilting novice that I guess I'm just grateful it's a rectangle really! Actually, I've been having a lot of trouble with the fabric being somewhat slippery. Note to self - buy stiffer fabric until I get the hang of this quilting business.
I think I shall name him "inspector #1" while he's in my craft room.
Thursday, October 28, 2010
Daily Craft - Ooh...Pretty!
I got these fabric packs and Joanns and I'm coming up with a quilt concept in my head. Picture these with black for contrast so that the colors pop. Pretty no? ;)
Wednesday, October 20, 2010
Daily Craft - Quilting: Where do I begin?
Before I begin my ramblings today, I would like to give a shout-out to my parents. Last week, they celebrated their 32nd wedding anniversary (yay!) and yesterday it was my mom's birthday. I figure it is well deserving of a mention!
As you may recall, I made this little patchwork blanket not too long ago. It was delivered to the intended recipient this weekend and very well received by parents and child (despite the wonky, mismatched corners). I'm also half way done with the simple quilt design I'm working on for my nephew. I can confirm that I've got the quilting bug.
Joann Fabrics has their Moonlight Madness sale going on right now - which is dangerous as far as I'm concerned. Last night, I headed over there armed with a plethora of 50% off coupons to get myself a good bargain. The challenge, of course, is that the coupons can't be used on sale items so I end up with the personal challenge of making sure I find something good that's not on sale to use them for. Husband doesn't quite understand this logic, but I'm sticking to it! Anyway, after arming myself with some awesome sale priced flannel for baby blankets, I then proceeded to search out non-sale fabrics for quilting purposes. Seeing as I'm a total quilting novice, I ended up with 3 coordinating fat quarter bundles and figured that I can go from there.
Now that I want to make something a little more complex in design, I'll readily admit that I am ridiculously overwhelmed as to where to begin with the quilting thing! It's like a chicken and egg to me - do you decide on the quilting pattern then buy the fabric, or the other way around? How much fabric are you supposed to buy if you don't know what you're going to do with it yet? Having already purchased fabric intended to go together, how easy is it to modify an existing pattern to make those fabrics work? The list of questions goes on and on!
Having spent some time at lunch today looking for quilt pattern ideas, I have found a couple ideas that I think will work, although doing all the math based on how many cuts for each fat quarter, and what other fabric supplies I need just might be doing my head in! I also think that I want to make all of these designs by Jinny Beyer. For now, I guess I'll keep doodling and calculating until I come up with something that makes sense. If I get it right, I suspect it'll be pretty though!
So, any experts out there that have tips to share?
As you may recall, I made this little patchwork blanket not too long ago. It was delivered to the intended recipient this weekend and very well received by parents and child (despite the wonky, mismatched corners). I'm also half way done with the simple quilt design I'm working on for my nephew. I can confirm that I've got the quilting bug.
Joann Fabrics has their Moonlight Madness sale going on right now - which is dangerous as far as I'm concerned. Last night, I headed over there armed with a plethora of 50% off coupons to get myself a good bargain. The challenge, of course, is that the coupons can't be used on sale items so I end up with the personal challenge of making sure I find something good that's not on sale to use them for. Husband doesn't quite understand this logic, but I'm sticking to it! Anyway, after arming myself with some awesome sale priced flannel for baby blankets, I then proceeded to search out non-sale fabrics for quilting purposes. Seeing as I'm a total quilting novice, I ended up with 3 coordinating fat quarter bundles and figured that I can go from there.
Now that I want to make something a little more complex in design, I'll readily admit that I am ridiculously overwhelmed as to where to begin with the quilting thing! It's like a chicken and egg to me - do you decide on the quilting pattern then buy the fabric, or the other way around? How much fabric are you supposed to buy if you don't know what you're going to do with it yet? Having already purchased fabric intended to go together, how easy is it to modify an existing pattern to make those fabrics work? The list of questions goes on and on!
Having spent some time at lunch today looking for quilt pattern ideas, I have found a couple ideas that I think will work, although doing all the math based on how many cuts for each fat quarter, and what other fabric supplies I need just might be doing my head in! I also think that I want to make all of these designs by Jinny Beyer. For now, I guess I'll keep doodling and calculating until I come up with something that makes sense. If I get it right, I suspect it'll be pretty though!
So, any experts out there that have tips to share?
Monday, September 13, 2010
Daily Craft - First patchwork blanket

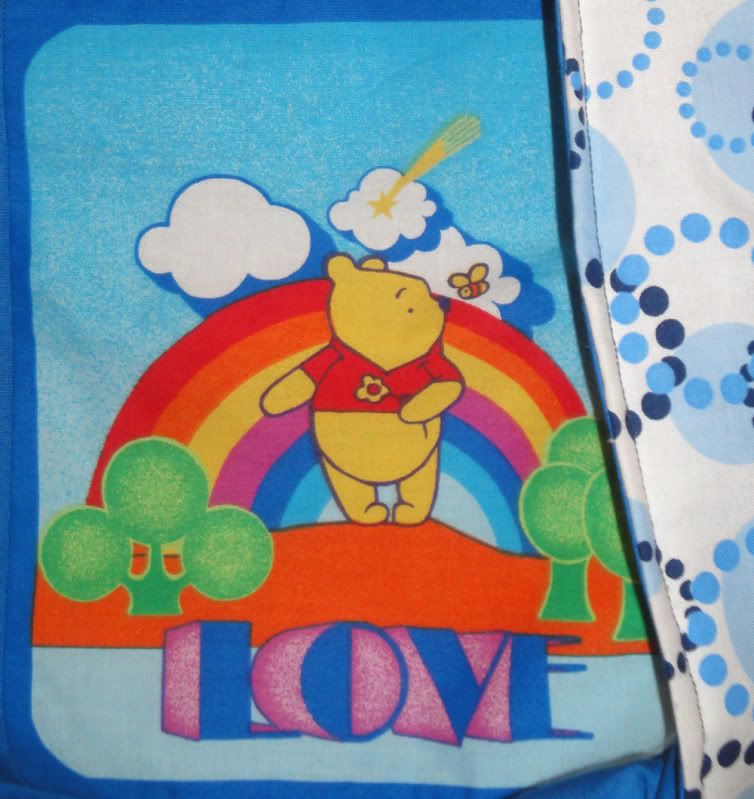
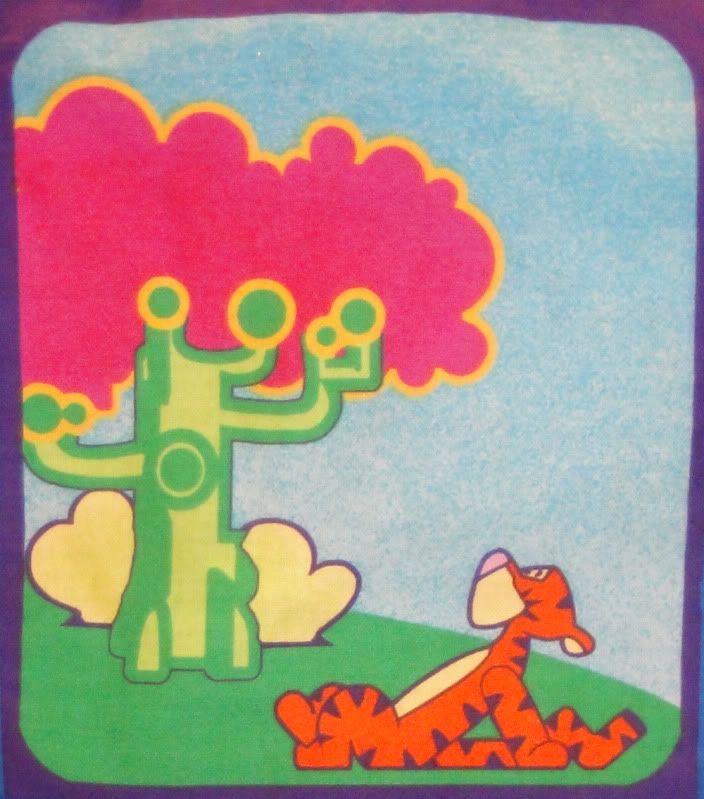
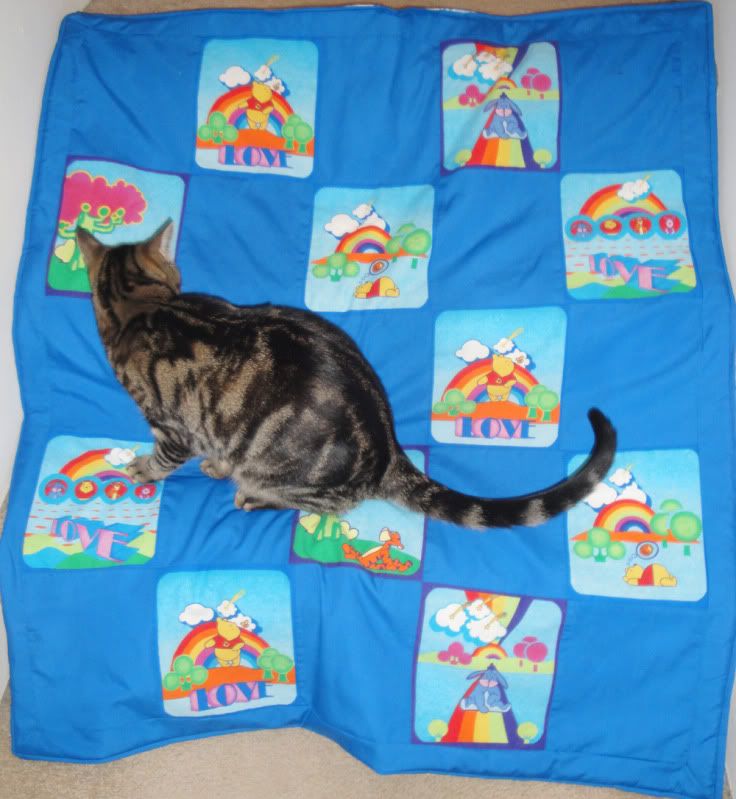
A little while ago, I claimed a couple yards of awesome retro Winnie The Pooh fabric as part of a swap package on Craftster. There were various panels with each of the beloved Pooh characters, with some rather garish yellow in between. I figured I could cut each of the panels out separately and replace the yellow with a more fitting color. I chose a pretty blue for the panel pieces, with a coordinating fabric for the back. I've never made patchwork before so this was a bit of an adventure for me (read: I was totally winging it). I'm mostly happy with the way it turned out, although it's wonky in a few places, some of the corners don't match up and, based on this initial project, I'm pretty sure that batting is a pain in the butt to work with. I'm also confident that I might be in love with creating patchwork and may very well end up adding quilting to the rather extensive list of things that I want to conquer.
I'm starting to develop all kinds of ideas in my head for fun patchwork baby blankets so this may require a trip to the fabric district downtown - it's like being lost in fabric heaven down there. I'll be bringing my camera to report back to you all when I go, for sure!
Of course, Deuce had to give it his approval when I was done. So, what will I do with my slightly crooked but oh so cute first attempt? The second I finished making it, I already knew who would love it to pieces and I'm excited to be able to gift it to them when I see them next. :)
Subscribe to:
Posts
(
Atom
)